
The Anchorage
Personal website of Gregory K. Maxey, Commander USN (Retired)
The Anchorage
Personal website of Gregory K. Maxey, Commander USN (Retired)
The information, illustrations and code contained in my "Microsoft Word Tips" are provided free and without risk or obligation.

However, the work is mine. If you use it for commercial purposes or benefit from my efforts through income earned or time saved then a donation, however small, will help to ensure the continued availability of this resource.
If you would like to donate, please use the appropriate donate button to access PayPal. Thank you!
This Microsoft Word Tips & Microsoft Word Help page describes my "Extract Data from Forms Version 3.1" Word template add-in.
Published originally as version 2.0, this add-in significantly expands the capabilities of "Extract Content Control Form Data" which it replaced. With this expanded capability, the add-in provides tools to process and extract data from:
The extracted data can be stored or viewed:
The add-in was developed in Word 2010 but tested and applicable to Word versions 2007/2010/2013/2016. It compliments a similar add-in, Word add-in to extract data from protected forms developed and published by my long time friend and frequent collaborator Graham Mayor.
I have previously published other template add-ins to facilitate data extraction including Extract Batch Form Data and Extract Data from Word Document File. This add-in refines and further develops many of the techniques I used in those. I have left them posted on this site so visitors can study and reference the VBA code.
Version 3.0 started life after Graham proposed using the ADODB engine and SQL to write the extracted data to Excel. I had been using the ADODB\SQL method for data extraction to Access in my version 2.0 and immediately saw the benefit of using it for Excel also.
Like most projects that Graham and I collaborate on, the capabilities of version 3.0 expanded significantly beyond just using ADODB for Excel. We have upgraded of the title\tag utility to support naming formfields and created a new utility to convert formfields to content controls.
![]() Note: One or more images in this tips page may still reflect version 2.0. I did not take the time to update every image so you may see some minor differences between the dialogs shown here and the dialogs in the actual add-in.
Note: One or more images in this tips page may still reflect version 2.0. I did not take the time to update every image so you may see some minor differences between the dialogs shown here and the dialogs in the actual add-in.
Version 3.1 shifts the emphasis from tagging (to process) content controls purposed for form data fields to tagging (to filter and exclude) content controls that perform other roles (e.g., a rich text control used to group boiler plate text and form data fields).
I have become convinced that the editing restriction "No Changes (Read Only) with exceptions (editors) is the most effective and robust method for using content controls in forms. Therefore the use and need of content controls for purposes other than form data entry is minimized.
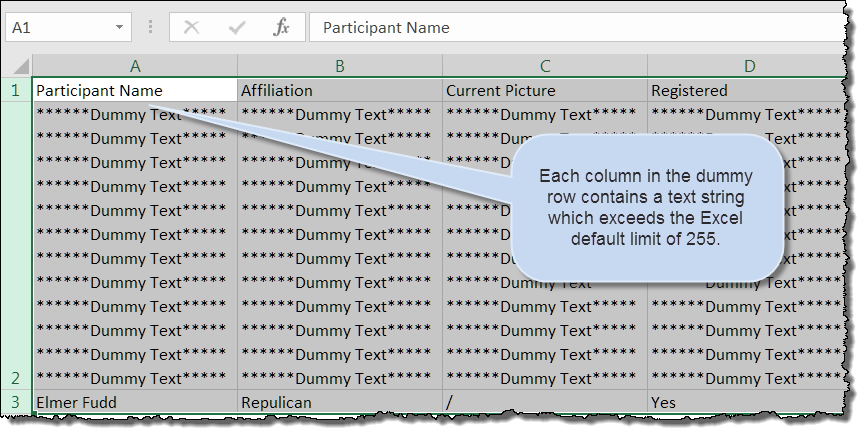
Resolved an issued encountered when the utility attempted to write individual field data to an Excel worksheet when the length of the data string exceeded 255 characters.
Excludes Access as a target data storage file if the form field count exceeds 255. Processes extraction to Excel when the form field count exceeds 255 using an instance of Excel (vice ADODB connection).
Corrects data fields conflict errors when batch processing files.
Before going into more details about the add-in, I need to discuss a few points about defining and using content controls in the forms. Understanding these points and applying them when you build your form documents, should ensure complete success with the add-in.
![]() Note: A checkbox control is not included with Word 2007. However, in many cases a two item dropdown list e.g., Yes and No/True or False etc., can be substituted for a checkbox.
Note: A checkbox control is not included with Word 2007. However, in many cases a two item dropdown list e.g., Yes and No/True or False etc., can be substituted for a checkbox.
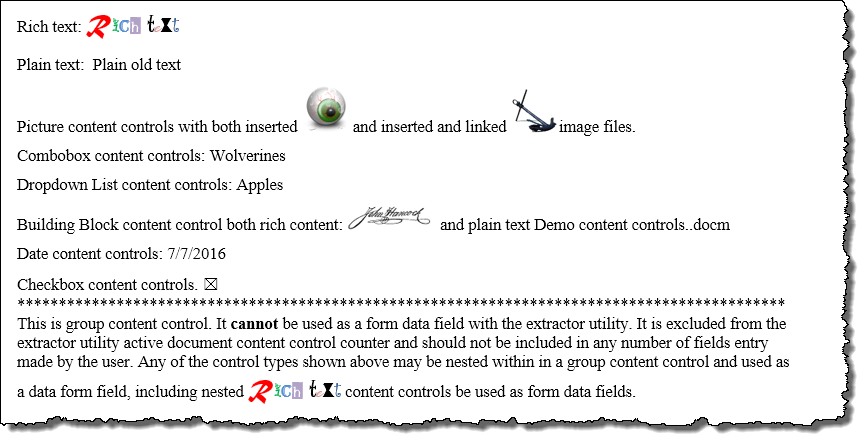
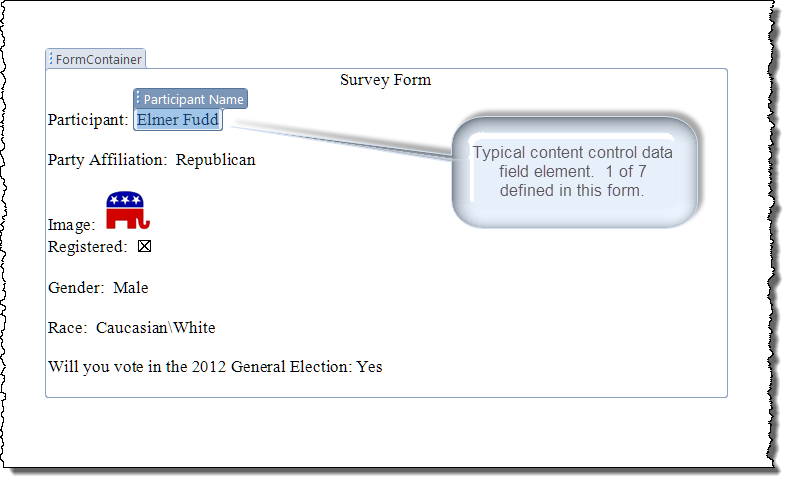
The illustration below depicts a representation of each content control supported by the add-in. The illustration depicts the form in design mode with content control titles applied.

In the illustration above I have used content control titles descriptive of the content control type. Each content control is purposed for data entry by the user.
In practice content controls purposed for data entry should be assigned a unique title descriptive of the intended data (e.g., the dropdown list shown might be titled "Favorite Fruit").
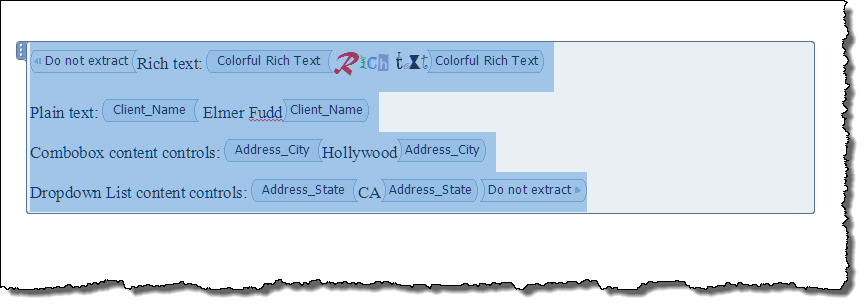
The next illustration depicts an example form in which a rich text content control is purposed for grouping\editing restrictions. It is shown without a title and is tagged using the default filter tag. It contains the four form data fields shown titled with meaningful titles.
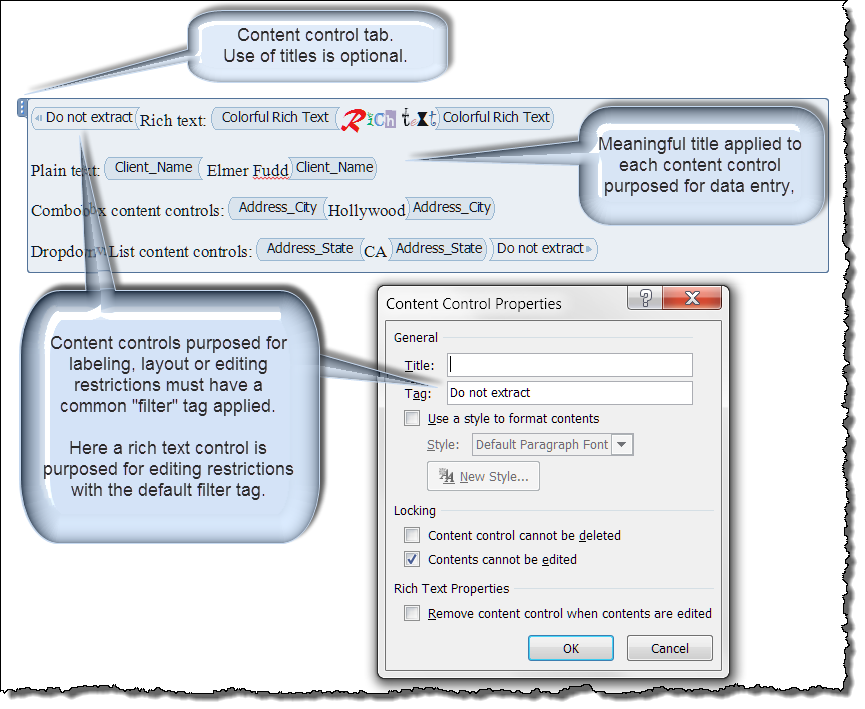
Remember, as stated earlier, if your form includes content controls (excluding group content controls) not purposed for form data entry, then those controls must be tagged using a defined common filter tag.
![]() Note: The extraction utility default common filter tag is Do not extract, as shown. However, when designing your forms you can define and apply any suitable common filter tag string.
Note: The extraction utility default common filter tag is Do not extract, as shown. However, when designing your forms you can define and apply any suitable common filter tag string.
Content control title and tag properties can be defined using the properties dialog shown above or by using the add-in Title/Tag Form Data Fields utility described below.
![]() Note: For additional information on using content controls in forms see my:
Note: For additional information on using content controls in forms see my:
Create Forms with Content Controls.
The Extract Data from Forms add-in is presented as a Word template and supplied in zipped format. You can download the template using the link at the end of this tips page.
When installed, the add-in displays a control group and controls on the Word Ribbon Add-Ins tab as shown below:
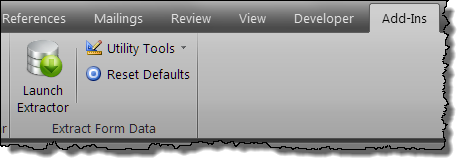

"Launch Extractor" is the add-in primary interface control. The controls in the "Utility Tools" menu initiate secondary support utilities. "Reset Defaults" resets the add-in stored values to the first use condition.
As the utility tools are intended to simplify preparation for using the extraction utility, I will describe them first.
![]() Note: During development, Graham and I discovered that content controls are inherently processed considerably faster than formfields. Additionally, the seemingly senseless and moronic [offense intended] internal changes that Microsoft made to the Word object module with Word 2013 significantly degraded many VBA looping processes including the process to loop through document formfields. Therefore, if you and your form users have access to Word 2010 or higher, I strongly encourage you to convert your forms that use formfields into forms that use content controls.
Note: During development, Graham and I discovered that content controls are inherently processed considerably faster than formfields. Additionally, the seemingly senseless and moronic [offense intended] internal changes that Microsoft made to the Word object module with Word 2013 significantly degraded many VBA looping processes including the process to loop through document formfields. Therefore, if you and your form users have access to Word 2010 or higher, I strongly encourage you to convert your forms that use formfields into forms that use content controls.
While the add-in fully supports data extraction from legacy formfields, this utility is available to assist users with Word 2007 or later who wish to upgrade legacy forms and take advantage of faster processing speed, increased flexibility in data field titles and spell checking afforded with content controls.
Provided the active document contains 1 or more defined formfields, this utility displays an interface similar to those shown below:
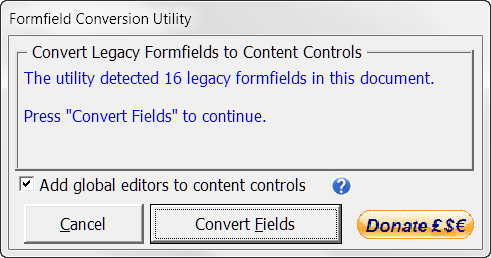
During conversion, the new content controls created are titled as determined by the following conditions:
The option "Add global editors to content controls" flags each content control created as an editable region in documents with restricted editing No changes (Read only) applied. This is the restriction method that I recommend for using content controls in forms.
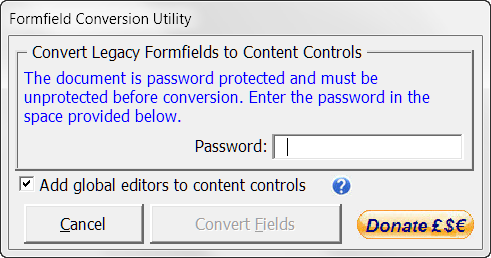
When global editors are added documents unprotected automatically by the utility or by a user entered password are re-protected using the No Changes (Read Only) method.
This utility assists you in to cycle through, review and set data field names\bookmarks (formfields) or titles/tags (content controls).
Since the name or title applied will eventually define the column/record headings in the extracted data storage files, you should take care apply meaningful and unique names/titles to each form data field.
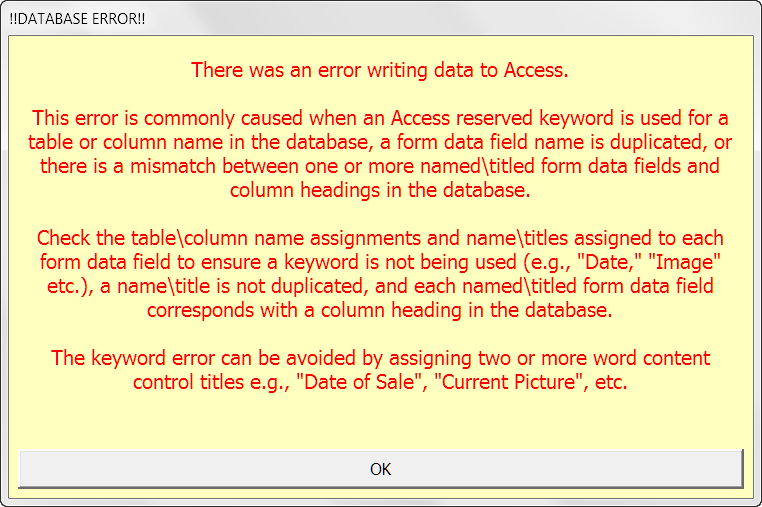
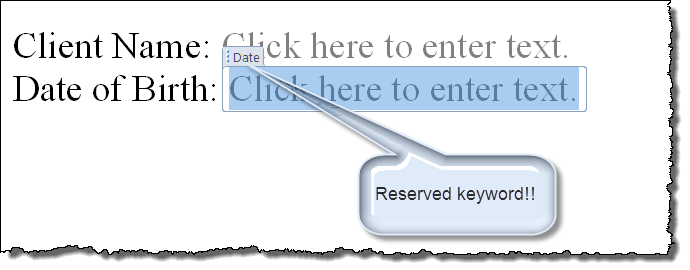
When assigning names/titles to data fields and using Access or Excel as the target data storage file, you must avoid using reserved keywords in the title names. For example, "Date" and "Image" are both Access restricted keywords.
You can avoid most keyword conflict issues by using a multi-word title (i.e., "Date_of_Issue", "Current_Picture", etc.)
If you use this utility to title content controls that will be mapped to an XML data node, you must avoid using invalid XML characters in the title name if the title is used to define the data node basename.
The add-in includes code to prevent using invalid XML characters and limited code to assist in preventing keyword conflicts. However, the keywords are subject to change and may not be inclusive. If you experience data extraction errors to either Access or Excel a possible cause is a keyword conflict.
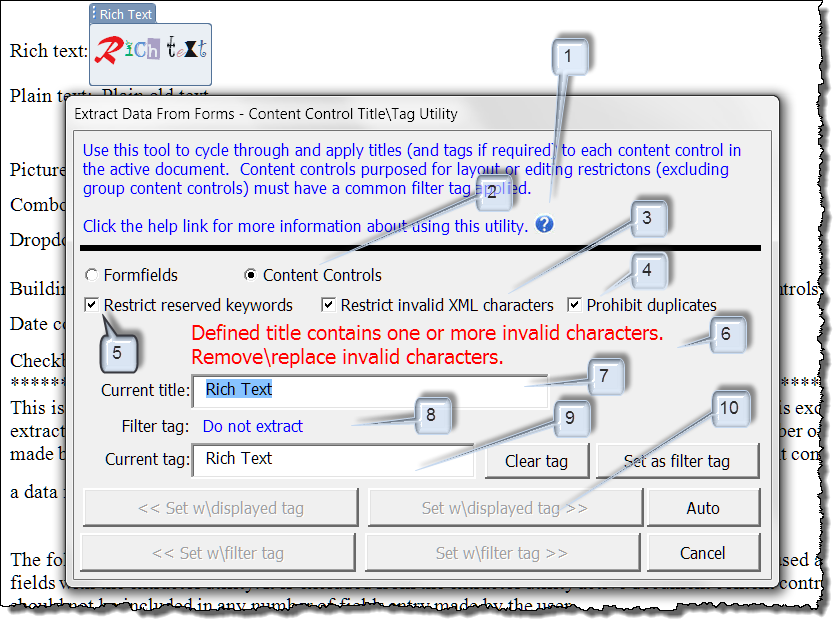
The illustration above depicts our first example form I created using the standard Word interface. When the utility is launched ...
The following provides a description of the numbered labels shown above:
![]() Note: The data extraction utility does not support extraction of data from comingled formfields and content controls to the same target data file.
Note: The data extraction utility does not support extraction of data from comingled formfields and content controls to the same target data file.
![]() Note: As illustrated above, the space in "Rich Text" is an invalid XML character resulting in the flagged condition.
Note: As illustrated above, the space in "Rich Text" is an invalid XML character resulting in the flagged condition.
The utility interface in Formfield mode is simplified with fewer required options.
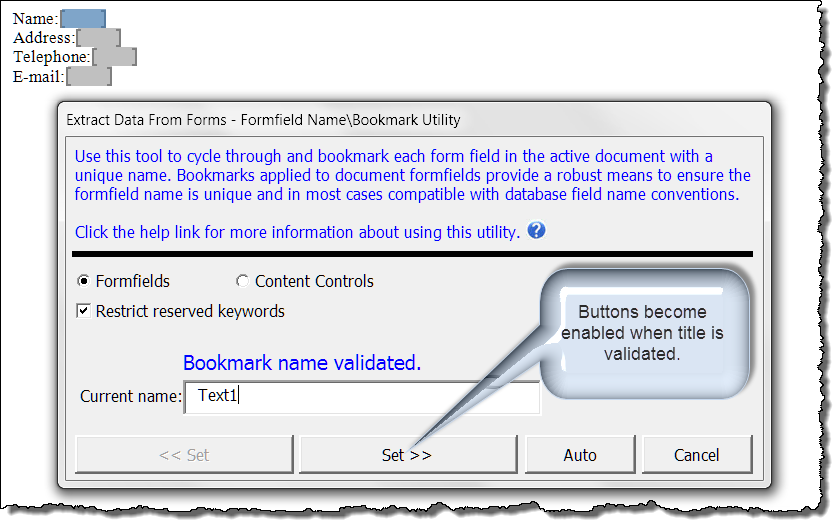
The utility is intended to name/title controls for use with data extraction and therefore it is Draconian in nature. The "Set" command buttons on the utility interface are enabled only when a valid name\title is defined for the selected control as shown above.
No title (empty current name/title) field is not a valid title. The utility can not be used to remove names/titles or selectively name/title controls.
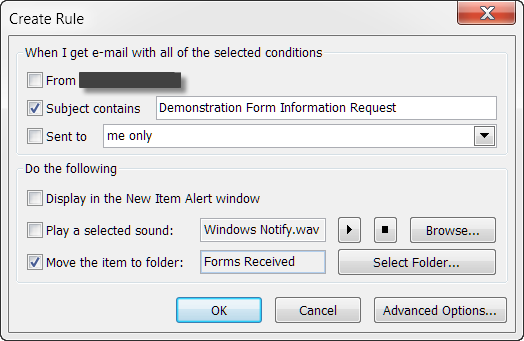
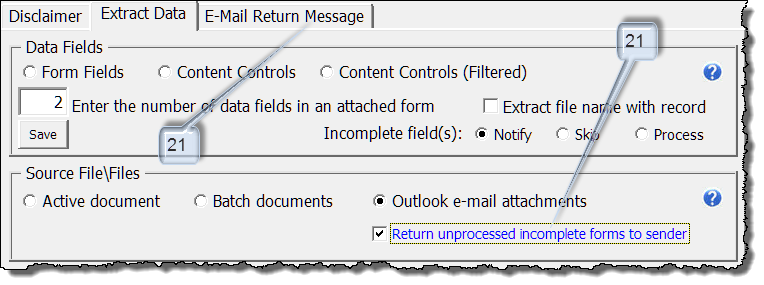
Before you can process Outlook mail item attachments using the add-in, appropriate folders and message rules must be created and defined in Outlook. This ensures that incoming messages from your form respondents are detected and properly routed. The add-in ribbon controls "Create Outlook Folders" creates/validates the required folders.

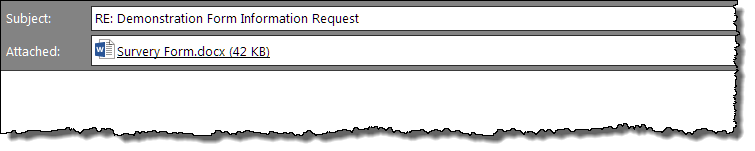
Detailed steps for setting up Outlook rules is beyond the scope of this discussion. There are plenty of examples in Outlook support forums for via Google search. Basically you simply need to create a rule based on the subject line of forms returned by your respondents via e-mail.
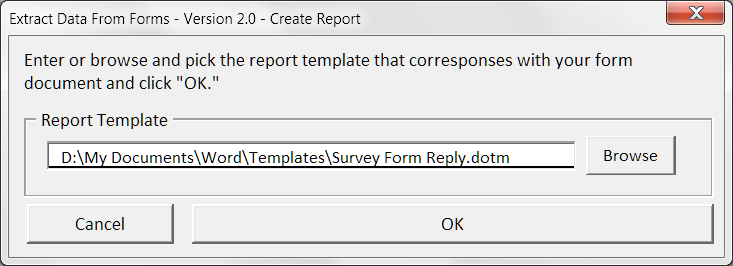
The "Create Report" is used to create a new document using information contained in a form open as the active document. The control displays a dialog that allows you to define the template associated with document you want to create. A more complete demonstration follows the discussion on using the add-in.
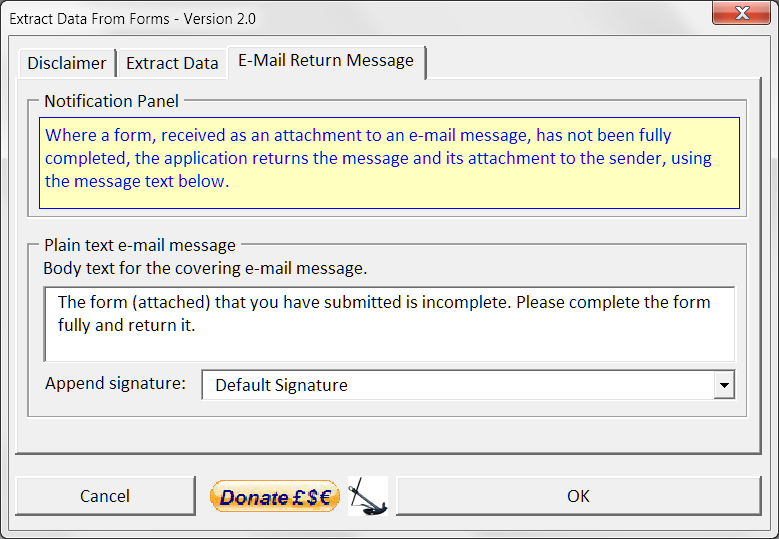
The first time you click the add-in "Launch Extractor" control, the main userform interface dialog displays a disclaimer notice. Before you can use the add-in to extract data or use the supporting utilities described above, you must accept the terms of the disclaimer.
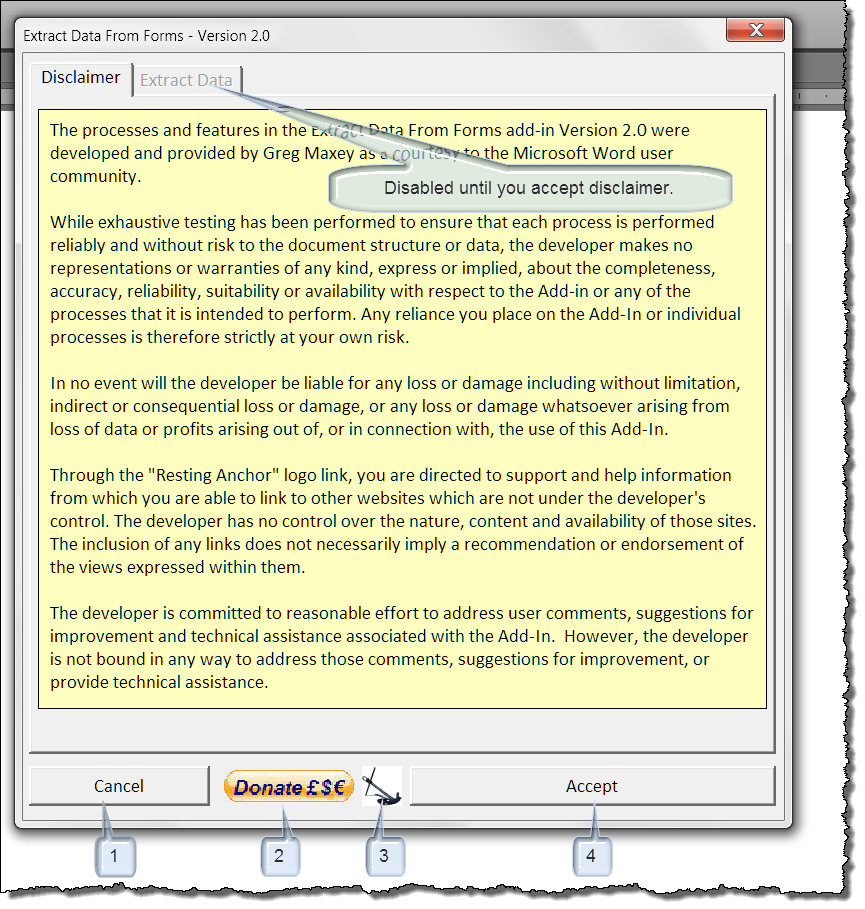
The add-in main dialog contains four common controls illustrated above.
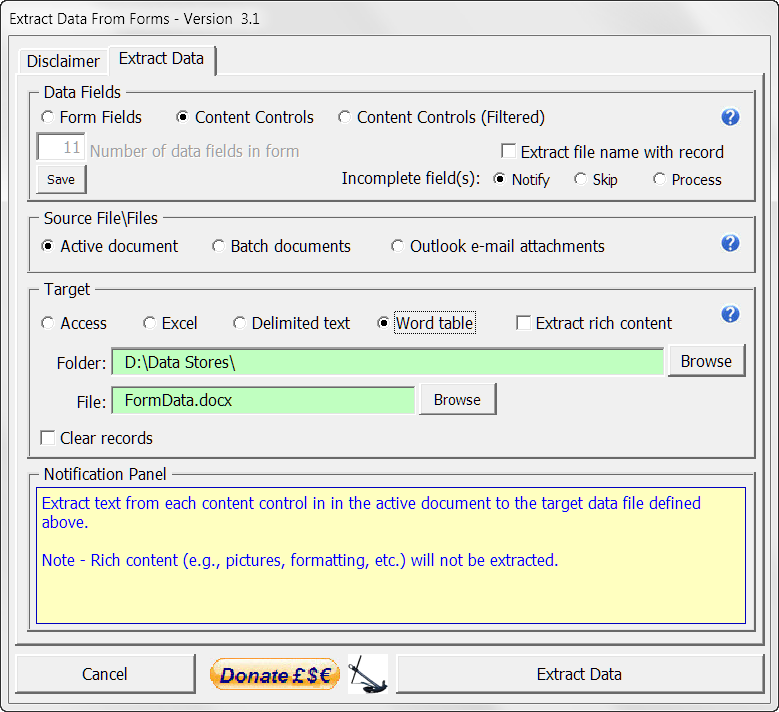
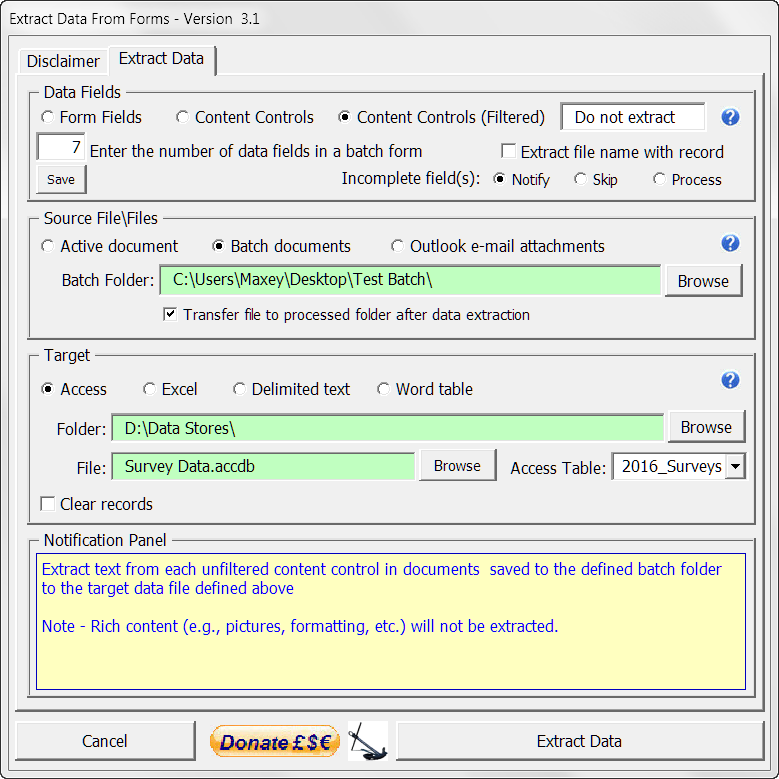
After accepting the disclaimer, the "Extract Data" page is displayed. Using the controls on this page you set the type of extraction, source file or files to extract from and the target.
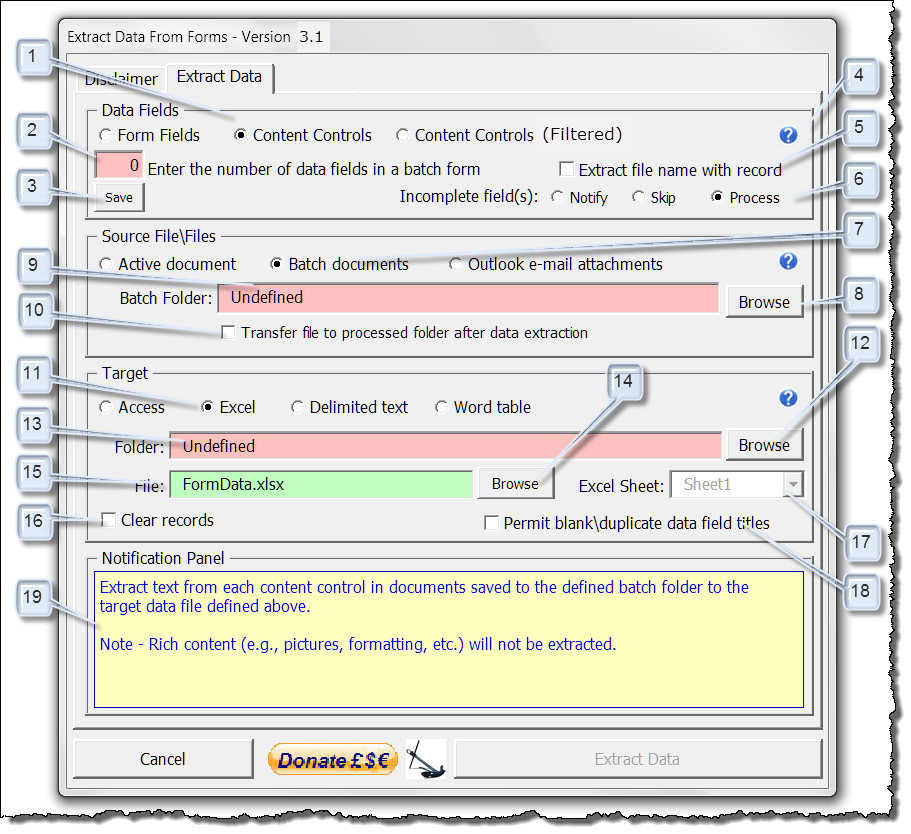
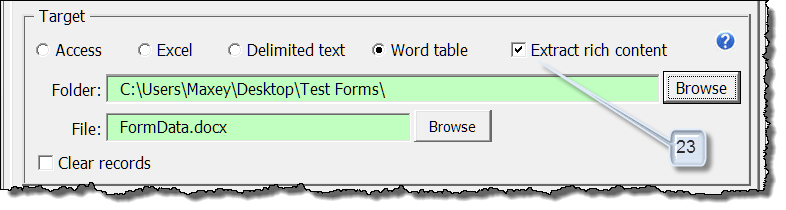
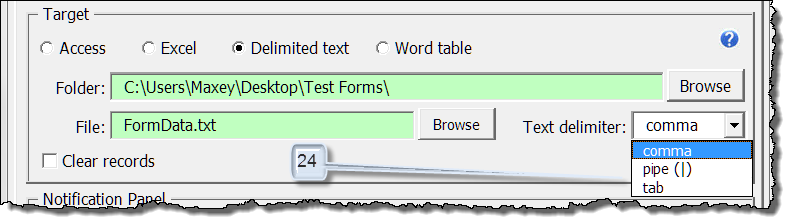
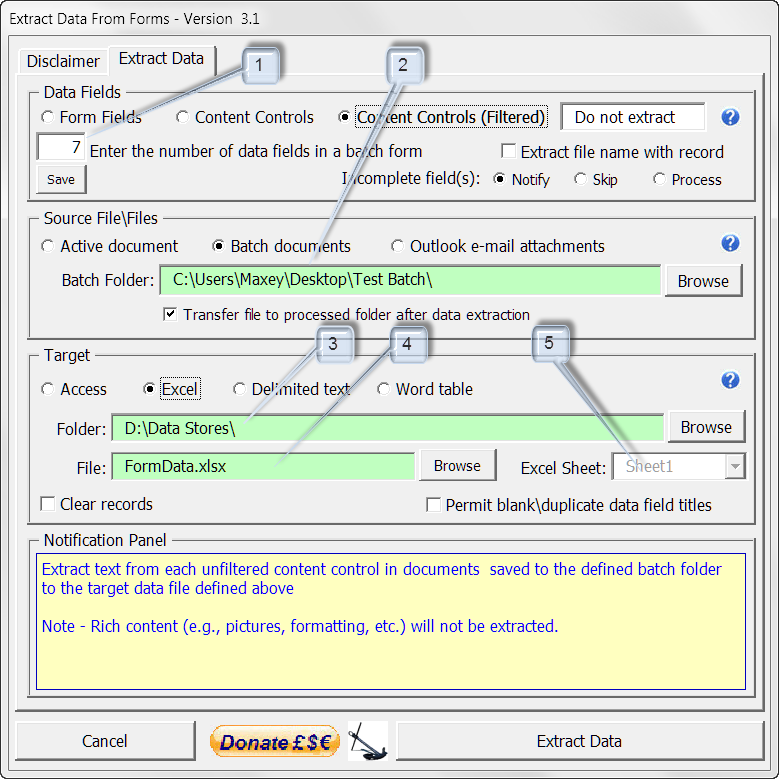
The main dialog consists of four control sections 1) Data Fields , 2) Source File\Files, 3) Target and 4) Notification Panel that you can use to define parameters for data extraction. The numbers in the illustration above are indexed to the following:
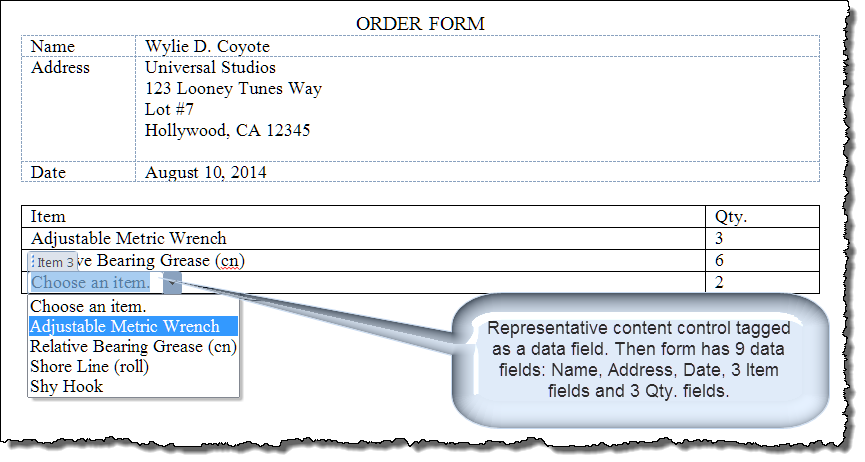
![]() Note: The value you assign in this field is critical to validating batch documents for processing. If the number you enter does not match the physical number of tagged content controls or form fields in the batch documents, processing will terminate or be incomplete.
Note: The value you assign in this field is critical to validating batch documents for processing. If the number you enter does not match the physical number of tagged content controls or form fields in the batch documents, processing will terminate or be incomplete.
The extractor utility user interface automatically reconfigures based on options selected. The following additional controls are not shown in the initial "First Use" display illustrated above.

In the following illustrations and discussion, I will show the results of actual data extractions using the add-in.
Data in form field or content control data fields from single documents (i.e., open active document) can be extracted using any of the four target modes.
![]() Note: Since all form content controls (excluding the group content control) is purposed for form data entry, the "content control" data field type is selected.
Note: Since all form content controls (excluding the group content control) is purposed for form data entry, the "content control" data field type is selected.

![]() Note: Most settings applied are "sticky" settings. This means that after you execute "Extract Data" and redisplay the add-in, your previous settings are recalled.
Note: Most settings applied are "sticky" settings. This means that after you execute "Extract Data" and redisplay the add-in, your previous settings are recalled.
![]() Notes:
Notes:
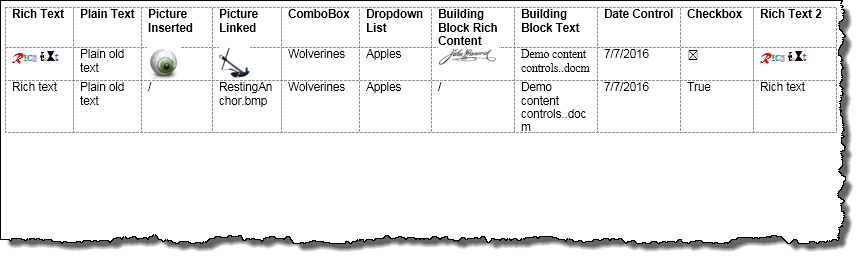
1. The example form data fields may seem whimsical or impractical but are intended to illustrate the unique capability to extract "rich content" (i.e., rich text formatting, graphics, and building block content) to a Word table target data file.
2. The extraction of "rich content" is only supported in the "Word table" target mode when the conditional "Extract images\content" option is selected. In all other target modes only text content is extracted and recorded, checkboxes resolve as true (checked)or false (unchecked), and the filename is extracted for linked pictures in picture content controls.
3. While the numerical limit of a Word table is 62 columns, here you see the practical limit is probably no more 10-15 data columns.
![]() Note: Design mode displayed so you can see the rich text content control used for editing restrictions.
Note: Design mode displayed so you can see the rich text content control used for editing restrictions.
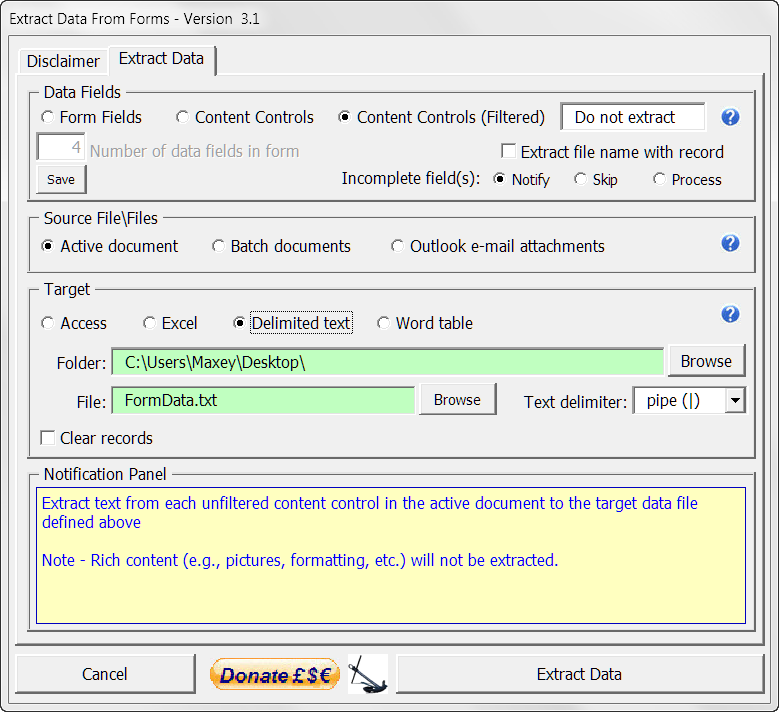
![]() Note: Since a rich text content control is purposed for editing restrictions and tagged with the common filter tag (Do not extract), Content Controls (Filtered) is selected as the data field type.
Note: Since a rich text content control is purposed for editing restrictions and tagged with the common filter tag (Do not extract), Content Controls (Filtered) is selected as the data field type.

![]() Note: Checkbox content controls "checked" symbols resolve as "True" in text only data storage files. The "unchecked" symbols resolve as "false."
Note: Checkbox content controls "checked" symbols resolve as "True" in text only data storage files. The "unchecked" symbols resolve as "false."
Data from formfield or content controls data fields in a batch of documents, stored either as Word documents in a file folder or as documents attached to e-mail in the Outlook "Forms Received" folder can be extracted using any of the four target modes.
The Word table and Delimited text file modes were demonstrated above. In the following illustrations and discussion, I will demonstrate the Excel and Access target modes.
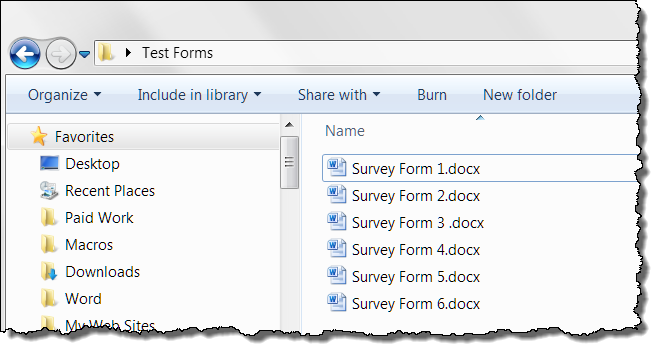
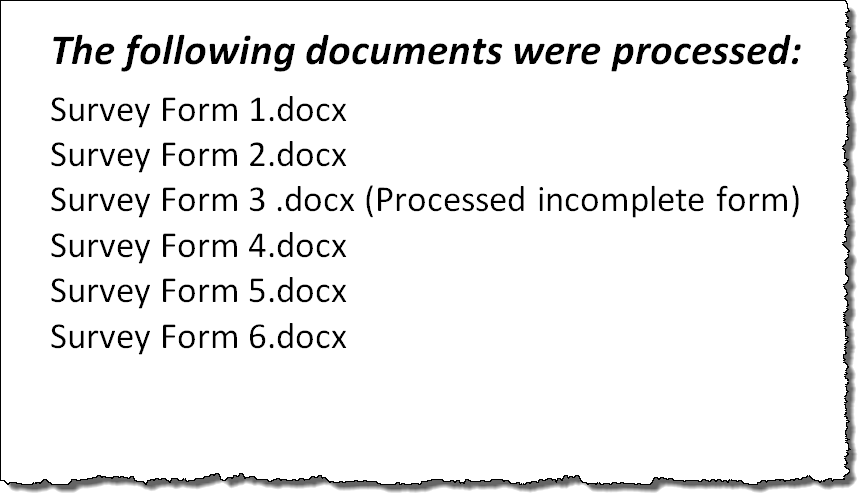
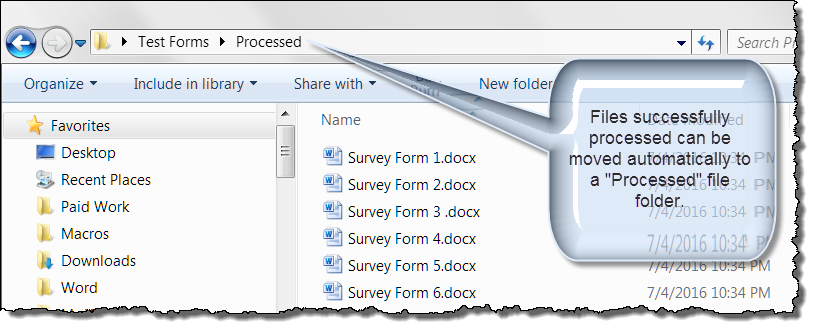
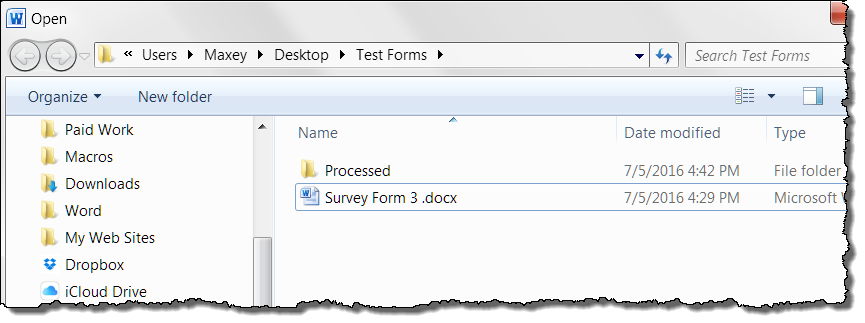
The batch documents consist of six numbered Survey Result documents stored in a local file folder named "Test Forms" on my PC desktop.
![]() Note:
The add-in will disable the "Extract Data" command button until all of the require entries are completed. It is up to you to ensure the correct data is entered.
Note:
The add-in will disable the "Extract Data" command button until all of the require entries are completed. It is up to you to ensure the correct data is entered.
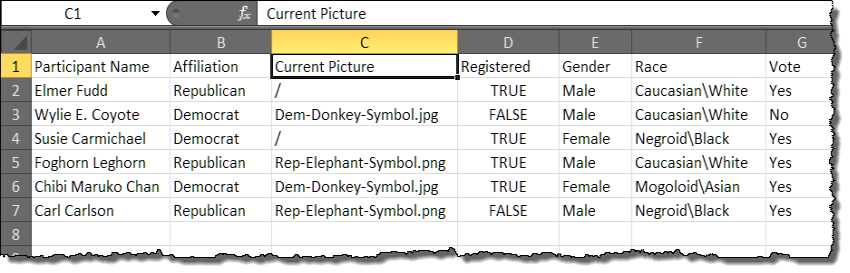
![]() Note: Image files can be inserted, linked or inserted and linked in Word documents. When a link is used, the image file name will be extracted. Otherwise, a forward slash "/" indicating a Word inline shape is extracted to the data file.
Note: Image files can be inserted, linked or inserted and linked in Word documents. When a link is used, the image file name will be extracted. Otherwise, a forward slash "/" indicating a Word inline shape is extracted to the data file.

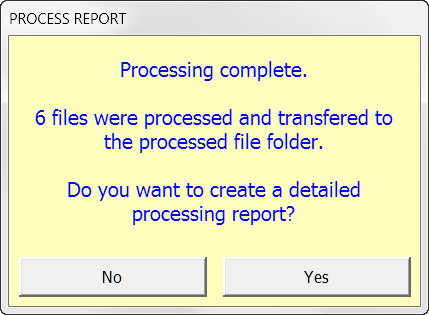
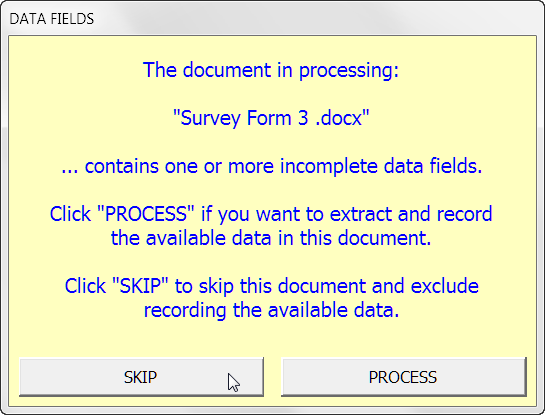
Form respondents may not always complete each field in your form. While this may be obvious when processing the active document, the add-in detects an incomplete field during processing. If you elect the "Incomplete Field(s): Notify" option, you are alerted and asked to continue processing or skip the incomplete form.

The add-in contains over twenty predefined user informational notifications and alerts that are displayed based on the processing configuration\results.
So far you have only seen examples of the informational notifications. When the add-in detects missing data or other conflicts, one of several alerts is displayed.
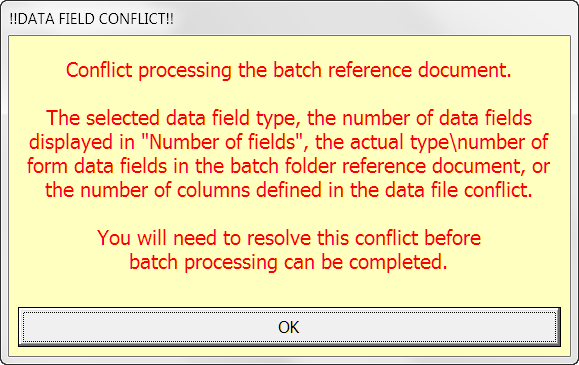

Care and attention both when designing the form and setting the values for data extraction should minimize your experience with these alert messsages.
The examples provided should give you enough confidence to explore the add-in and employ it to meet your specific needs.
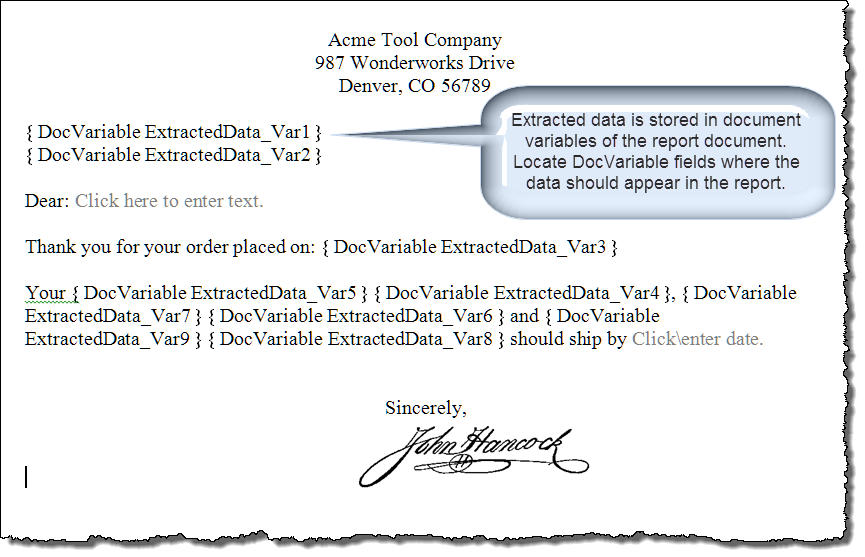
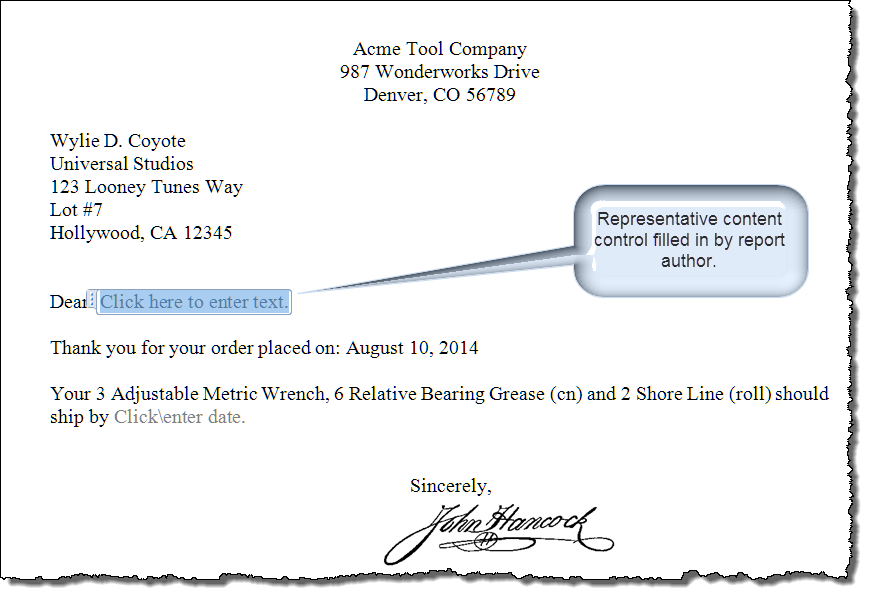
Employing a user defined template and the "Create Report" control, you can create a report (or other summary type document) based on data field content in the open form as the illustrations and discussion below will demonstrate.
You can download the template add-in here: Extract Data From Forms. For installation instructions, see: Organizing your Macros\Template Add-Ins.
That's it! I hope you have found this tips page useful and informative.
The information, illustrations and code contained in my "Microsoft Word Tips" are provided free and without risk or obligation.
However, the work is mine. If you use it for commercial purposes or benefit from my efforts through income earned or time saved then a donation, however small, will help to ensure the continued availability of this resource.
If you would like to donate, please use the appropriate donate button to access PayPal. Thank you!
This page was last updated on
March 09, 2021
Website
Privacy Statement
Back to top ![]() Back to
Word Tips
Back to
Word Tips