The Anchorage
Personal website of Gregory K. Maxey, Commander USN (Retired)

The Anchorage
Personal website of Gregory K. Maxey, Commander USN (Retired)
The information, illustrations and code contained in my "Microsoft Word Tips" are provided free and without risk or obligation.


However, the work is mine. If you use it for commercial purposes or benefit from my efforts through income earned or time saved then a donation, however small, will help to ensure the continued availability of this resource.
If you would like to donate, please use the appropriate donate button to access PayPal. Thank you!
This Microsoft Word Tips & Microsoft Word Help page discusses some of the peculiarities users may experience when working with "classic" WordArt in Word 2010/2013. It also contains a few observations on "new" WordArt.
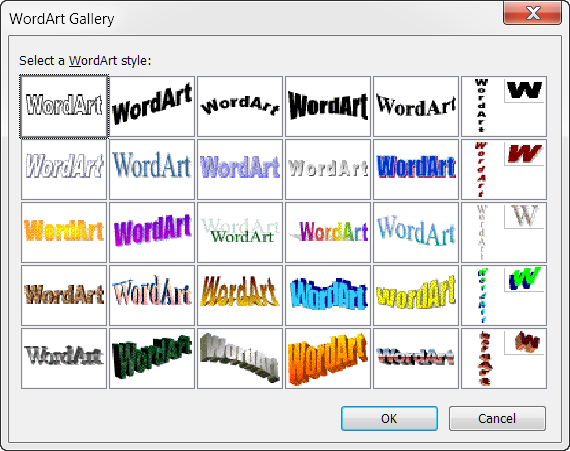
For the purpose of this tips page, I define "classic" WordArt to be WordArt that has the properties of WordArt created in Word versions 2003/2007. Compared to the "new" WordArt, or WordArt created with Word 2010/2013, classic WordArt is likely more familiar to long time Word users, and offers a broader range of initial styles.
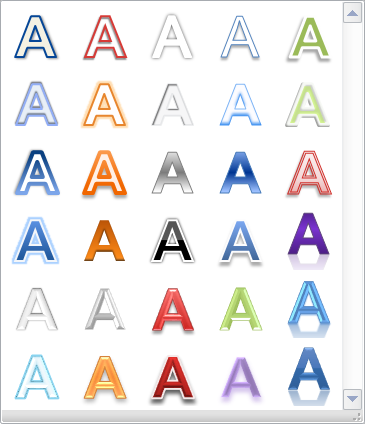
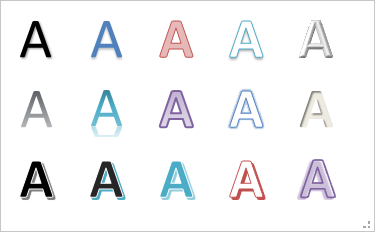
The initial "classic" and "new" WordArt styles (i.e., text effects) are illustrated below. For reasons known only to the Word 2013 developers, the available WordArt Styles (predefined text effects) was reduced from thirty (30) in Word 2010 to fifteen (15) in Word 2013.
![]() Note: The actual appearance of the styles (text effects) in the Word 2010/2013 galleries will change depending on the theme colors applied in the document.
Note: The actual appearance of the styles (text effects) in the Word 2010/2013 galleries will change depending on the theme colors applied in the document.
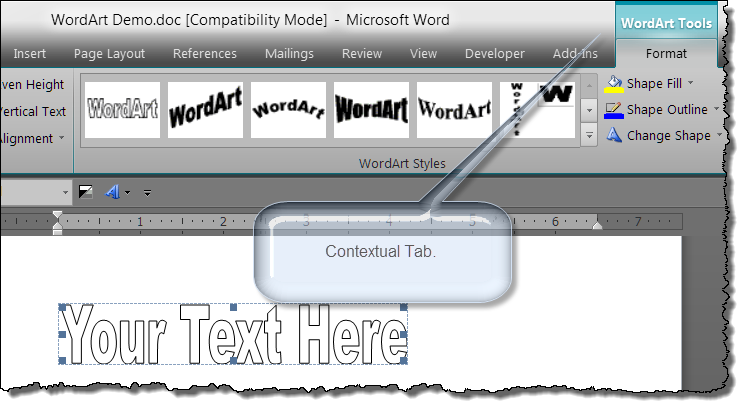
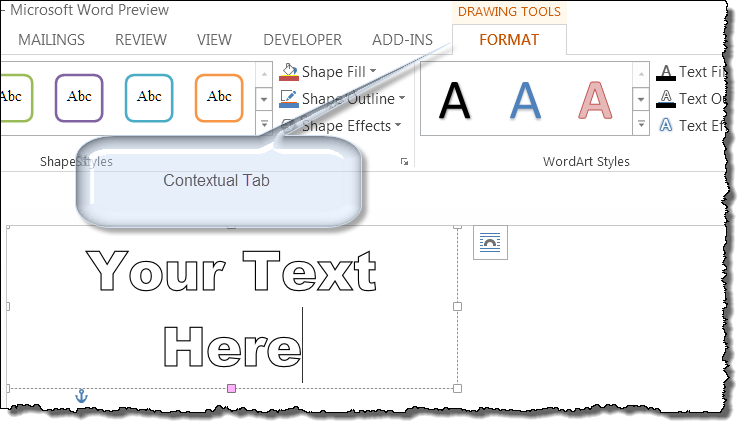
WordArt objects in Word 2003 and Word 2007 are basically the same. The difference is the user interface for inserting and formatting the object (a menu and toolbar for Word 2003, the ribbon and a contextual tab for Word 2007).
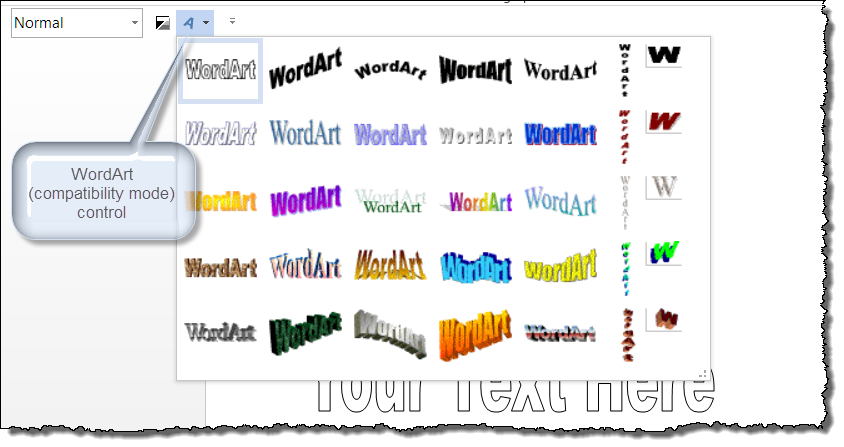
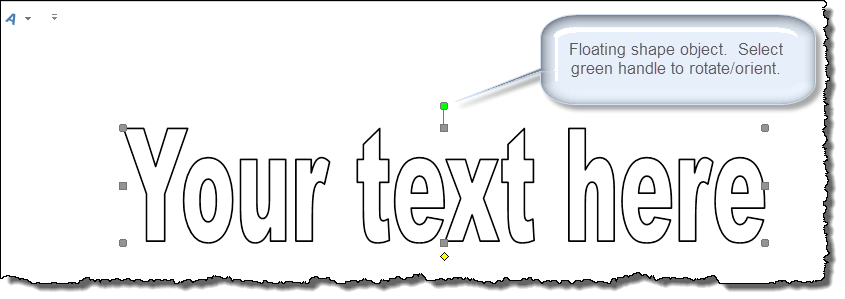

At this point, it appears that there is no way to use the familiar classic WordArt in a Word 2013 format document in Word 2013.
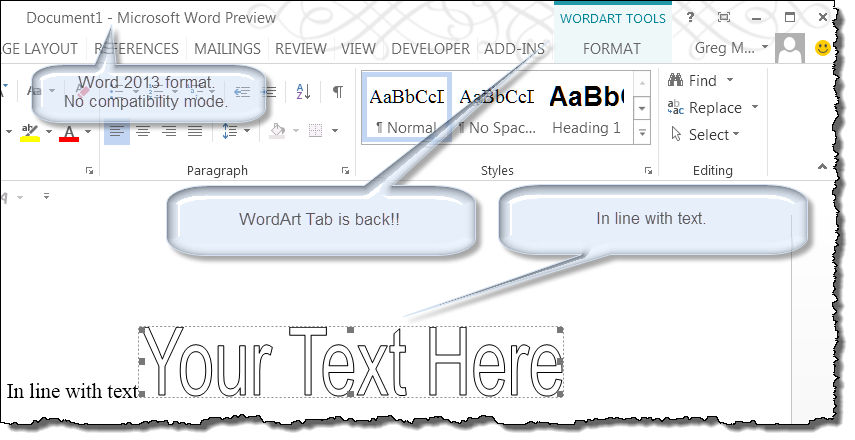
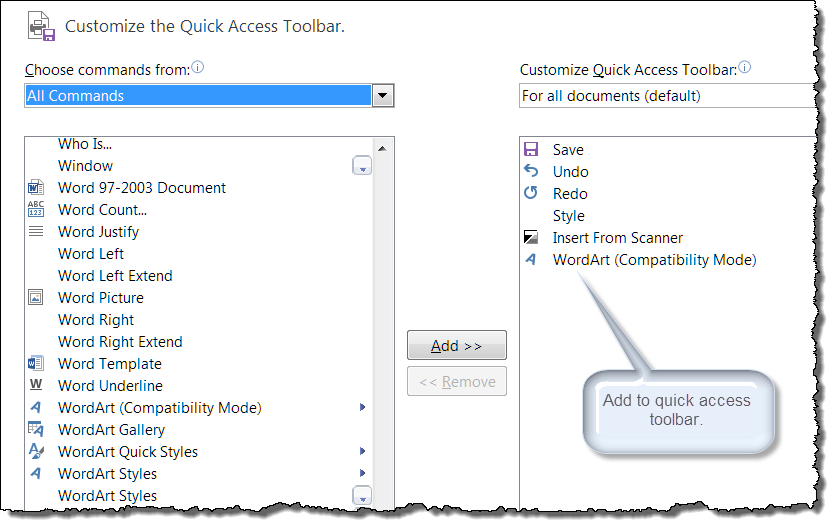
The procedure used is simple and can easily be added to the a keyboard shortcut or the QAT.
Sub ClassicWordArtInsert()
Dim oShp As Word.Shape
Dim oILS as Word.InlineShape
  Set oShp = ActiveDocument.Shapes.AddTextEffect(Office.MsoPresetTextEffect.msoTextEffect1, _
       "Your Text Here", "Arial", 36, _
       Office.MsoTriState.msoFalse, Office.MsoTriState.msoFalse, 0, 0, Selection.Range)
  If MsgBox("Do you want your classic WordArt object inline with text?", _
            vbQuestion + vbYesNo, "Classic Inline") = vbYes Then
    Set oILS = oShp.ConvertToInlineShape
  End If
  On Error Resume Next
  oShp.Select
  oILS.Select
  On Error GoTo 0
lbl_Exit:
  Exit Sub
End Sub
![]() See: Installing Macros for instructions on how to set up and use the macros provided in this Microsoft Word Help & Microsoft Word Tips page. This link provides another link that shows you how to add the macro to the QAT.
See: Installing Macros for instructions on how to set up and use the macros provided in this Microsoft Word Help & Microsoft Word Tips page. This link provides another link that shows you how to add the macro to the QAT.
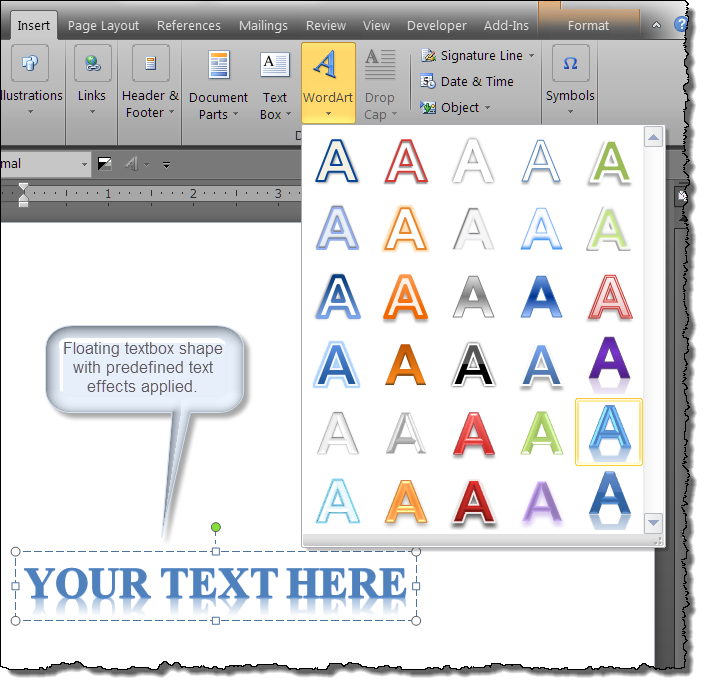
New WordArt begins life as a floating shape object (textbox type) with a set of predefined text effects applied to the default text.
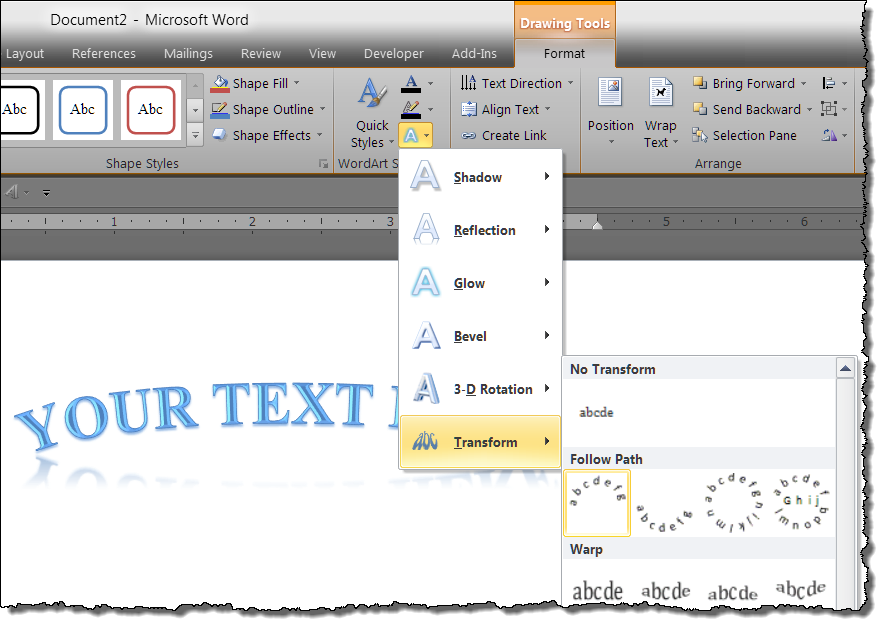
The effects available to further edit and refine the default entry in practically unlimited. For example you can use the Drawing Tools Format contextual tab and the Text Effect tools to apply countless variations of shadow, reflection, glow, bevel, rotation and transformation effects.
Due to known issues in the application object model, it is impossible to programmatically insert a WordArt object with one of the new predefined WordArt styles applied, or programmatically create and insert your own WordArt styles with certain properties applied that are available via the user interface.
These built-in styles and the user interface include properties that are simply not accessibly with the VBA object model (e.g., gradient stops, shadow angle and distance, line cap styles, etc.).
You can come close. For example, the following illustrates a WordArt object created programmatically compared to a similar WordArt object created using the new WordArt style gallery in a Word 2010 document.
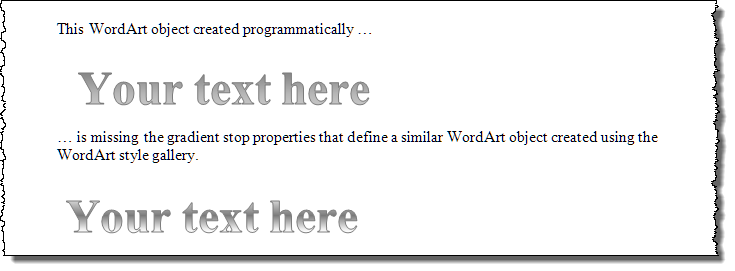
![]() Note: Remember, a Word 2010/2013 WordArt object is just a textbox with text effects applied to the content.
Note: Remember, a Word 2010/2013 WordArt object is just a textbox with text effects applied to the content.
Sub AttemptToDuplicateWordArt()
'This code attempts to duplicate a Word 2010 WordArt Style.
'The style attempted is the one in the third row, third column of the gallery.
Dim oShp As Word.Shape
Dim sngLeft As Single
Dim sngTop As Single
sngLeft = Selection.Information(wdHorizontalPositionRelativeToPage)
sngTop = Selection.Information(wdVerticalPositionRelativeToPage)
Set oShp = ActiveDocument.Shapes.AddTextbox(msoTextOrientationHorizontal, sngLeft, sngTop, 275, 48)
  With oShp
     .Line.Visible = msoFalse
     With .TextFrame.TextRange
       .Text = "Your text here"
       With .Font
         .TextColor.RGB = RGB(0, 0, 0)
         .Size = 36
         .Bold = True
         With .Line
           .ForeColor.RGB = RGB(122, 122, 122)
           .Style = msoLineSingle
           .Visible = msoTrue
           .Transparency = 0
           .Weight = 0.83
         End With
         With .Fill
           .ForeColor.RGB = RGB(122, 122, 122)
           .OneColorGradient msoGradientHorizontal, 1, 0.8
           .GradientAngle = 90
           'The following would error as the .GradientStop property is _
            not accessible with the VBA object model.
           '.GradientStops.Insert RGB(255, 255, 255), 9, 0, 1
           '.GradientStops.Insert RGB(255, 255, 255), 9, 0, 2
           '.GradientStops.Insert RGB(122, 122, 122), 50, 0, 3
           '.GradientStops.Insert RGB(255, 255, 255), 79, 0, 4
           '.GradientStops.Insert RGB(255, 255, 255), 100, 0, 50
         End With
       End With
       .Select
     End With
  End With
End Sub
This is truly unfortunate considering the vastly expanded text effects formatting options available.
That's it! I hope you have found this tips page useful and informative.
The information, illustrations and code contained in my "Microsoft Word Tips" are provided free and without risk or obligation.


However, the work is mine. If you use it for commercial purposes or benefit from my efforts through income earned or time saved then a donation, however small, will help to ensure the continued availability of this resource.
If you would like to donate, please use the appropriate donate button to access PayPal. Thank you!