
The Anchorage
Personal website of Gregory K. Maxey, Commander USN (Retired)

The Anchorage
Personal website of Gregory K. Maxey, Commander USN (Retired)
The information, illustrations and code contained in my "Microsoft Word Tips" are provided free and without risk or obligation.


However, the work is mine. If you use it for commercial purposes or benefit from my efforts through income earned or time saved then a donation, however small, will help to ensure the continued availability of this resource.
If you would like to donate, please use the appropriate donate button to access PayPal. Thank you!
This Microsoft Word Tips & Microsoft Word Help page offers my attempt at providing some "helpful" help to those novice and intermediate Word users who may be trying to understand, or who would like to employ CustomXMLParts and the associated events, properties and methods in their Word documents.
So why "helpful" help? Well, that is intended to distinguish it from "most" of the so called "help" that Microsoft provides. For example, consider the following Microsoft Help topic:
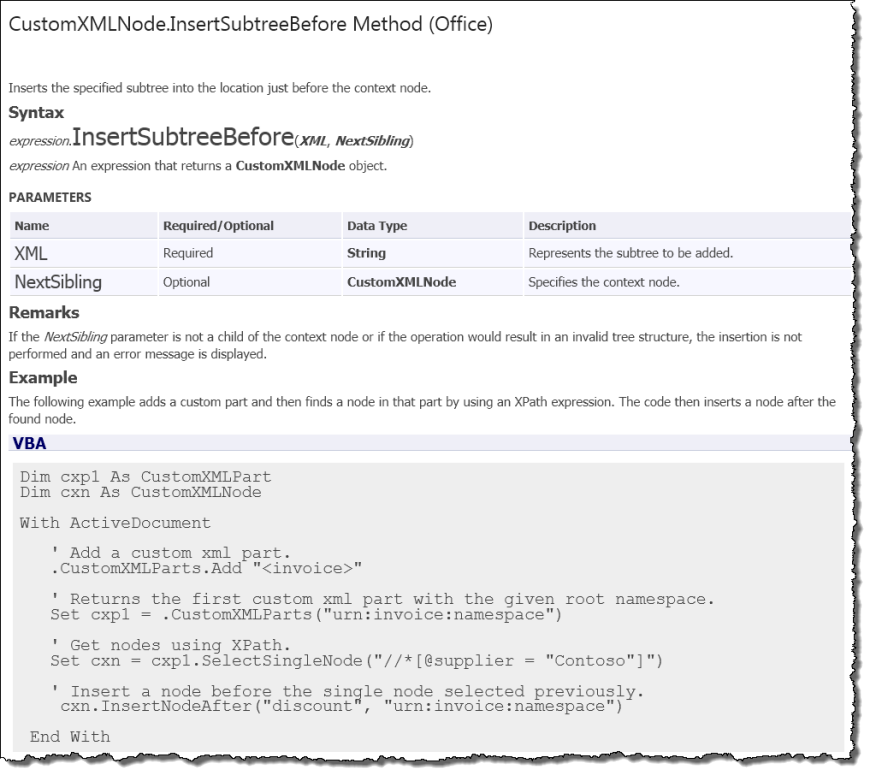
The first part (i.e., syntax, parameters and remarks) isn't so bad, but look at the example!!
Ok, I concede that providing an example of "InsertNodeAfter" method code in the "InsertSubtreeBefore" method topic could be an honest mistake, but it gets worse.
If you add the example code to a project, it doesn't even compile!
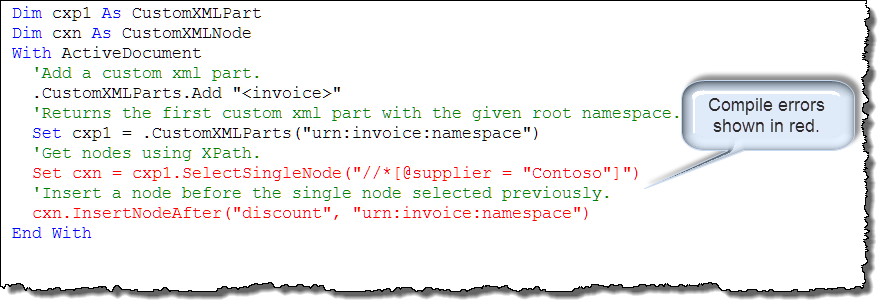
Even if you can get the example to compile (at design time), it still won't run due to another compile error at run-time. There is no such method as .InsertNodeAfter in the object model!!
So, I ask myself, how helpful is that?
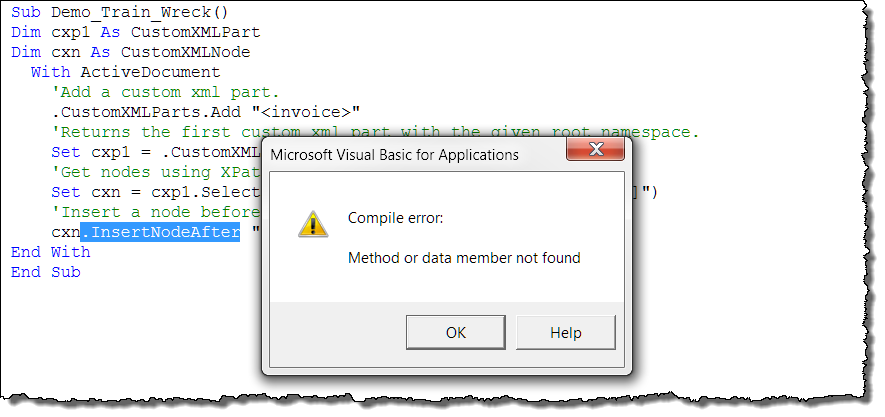
Unfortunately, the example is typical of many of the help topics that Microsoft provides to support the document CustomXMLParts object. These help topics generally have two major flaws:
Without some introductory training in XML and without functional examples of the events, methods, and properties of CustomXMLParts and related objects, it is really difficult and very frustrating to understand and employ them in your documents. I know! I've spent countless hours sitting in clumps of hair and bloody scalp trying to figure it out. ![]()
Hopefully, after practicing with the demonstrations and examples provided in this tips page, you can be spared the same torment.
What are CustomXMLParts? Basically, CustomXMLParts are a XML documents that are a "part" of the Office Open XML format file which constitutes your Word document. An XML document is simply:
![]() Word 2007-2019 format (.docx and .docm) documents are a package of various XML documents contained in an Office Open XML format file. CustomXMLParts represent one type of these documents.
Word 2007-2019 format (.docx and .docm) documents are a package of various XML documents contained in an Office Open XML format file. CustomXMLParts represent one type of these documents.
The illustration below is an example of a simple XML document:

XML documents are used to store and arrange data. Every Word document (after Word 2007) exists as an Office Open XML format file. This file contains at least three CustomXMLParts. These three parts are built-in and can not be deleted. You can prove this if you like, by opening a new Word document, then adding and running the following code:
Sub CustomXMLParts_Demo()
Dim oCXPart As CustomXMLPart
  Debug.Print ActiveDocument.CustomXMLParts.Count
  For Each oCXPart In ActiveDocument.CustomXMLParts
    Debug.Print oCXPart.BuiltIn
    On Error GoTo Err_Delete
    oCXPart.Delete
  Next oCXPart
  Exit Sub
Err_Delete:
  Resume Next
End Sub
![]() See: Installing Macros for instructions on how to set up and use the macros provided in this Microsoft Word Help & Microsoft Word Tips page.
See: Installing Macros for instructions on how to set up and use the macros provided in this Microsoft Word Help & Microsoft Word Tips page.
The XML document illustrated earlier represents one of these built-in CustomXMLParts. It is CustomXMLPart 1 (one), and it stores data related to the several document core properties (e.g., creator, subject, title, etc.).
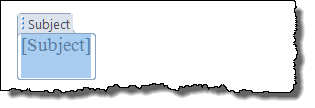
These document properties are "bound" to data nodes in the XML document. If I use Insert>QuickParts>Document Property to insert a Subject document property content control in a Word document, the control is empty (or showing placeholder text) as shown on the left in the illustration below. This is because the data node "<dc:subject/>" in the XML document is empty.
 |
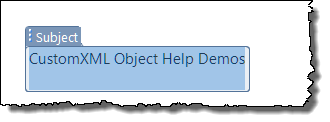 |
If I define a subject document property using the control as shown on the right, a very interesting thing happens! The XML document is automatically updated to reflect the new information. You can prove this by pasting and executing the following code line in the VB Editor immediate window:
![]() Note: If not displayed, you can display the VB Editor Immediate window using the VBA Editor view menu or by simply pressing the shortcut Ctrl+g while in the editor.
Note: If not displayed, you can display the VB Editor Immediate window using the VBA Editor view menu or by simply pressing the shortcut Ctrl+g while in the editor.
The resulting XML document is shown below:

This "data" binding between the built-in CustomXMLParts and document property content controls can be expanded and include CustomXMLParts that you can create yourself and bind to other content controls in your documents. This process is discussed in detail in Repeating Data, Mapped Content Controls and Mayor & Maxey CC/V/B and DP Tools Add-In
The remainder of this tips page is dedicated to offering you functional demonstrations of the events, methods and properties associated with the CustomXMLParts/CustomXMLPart object and their related objects e.g., CustomXMLNodes object, CustomXMLPrefixMapping object, etc.
To do this, you need to download the following set of files: CustomXML Help Files
The file set contains the main demonstration Word document file and four auxiliary support files:
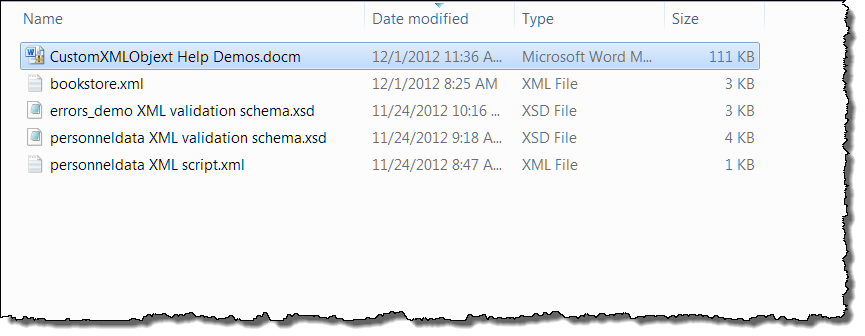
Save the Word document with your document files and save the supporting .xml and .xsd files in any convenient folder.
Open the CustomXML Help Demos document and open the VB Editor by pressing Alt+F11.
![]() Note: The demonstration document contains macros. Depending on your macro security settings, the macros may not run or require users enabling to run. Adjust your security settings accordingly.
Note: The demonstration document contains macros. Depending on your macro security settings, the macros may not run or require users enabling to run. Adjust your security settings accordingly.
Set up your VB edit as shown below:

Change the strPath expression at the top of the modDemos module to reflect the path to the folder that you used to saved the support files.

Running the demos is something that you can do an your own pace by stepping though the procedures and observing the interaction between the code line execution and the result presented in the immediate window.
To start, place your cursor at the beginning of the Demo_CustomXMLParts procedure and press the F8 key.
When you do, the line to execute is highlighted as shown.
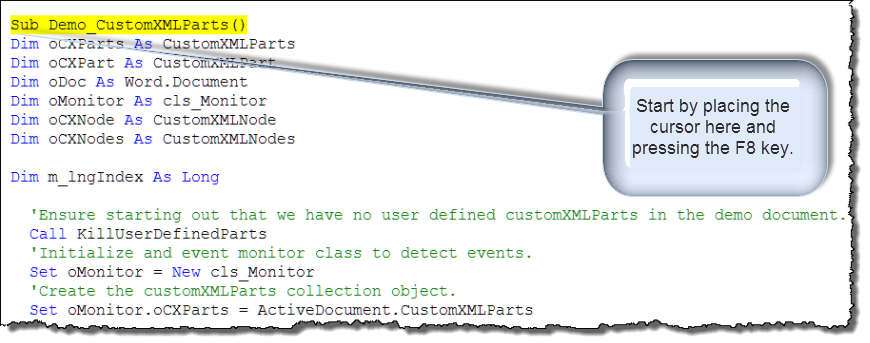
Continue to press the F8 key at your own pace. Watch the sequence as code lines are executed and observe returned results in the immediate window. The following illustrates some of the results you will see in the immediate windows.

![]() Bonus tip: If you have trouble keeping track of the immediate window results, you can clean it out by putting you cursor in the window, pressing ctrl+a (to select all content) the pressing the delete key.
Bonus tip: If you have trouble keeping track of the immediate window results, you can clean it out by putting you cursor in the window, pressing ctrl+a (to select all content) the pressing the delete key.
There are several areas in the demonstration with rather long loops. As, like me, you might get tired of stepping through each step of the loop, I've added stop statements after these loops. So if you want, you can click F5 and let the code run automatically to the stop.

Most of the demos are in the mod_Demos module and you can start and run each of them in the same manner described above. The XPath demo is rather long and I separated it into its own module. The cls_Monitor supports the demos as you will discover when you try them out.
That's it! I hope you have found this tips page useful and informative.
The information, illustrations and code contained in my "Microsoft Word Tips" are provided free and without risk or obligation.


However, the work is mine. If you use it for commercial purposes or benefit from my efforts through income earned or time saved then a donation, however small, will help to ensure the continued availability of this resource.
If you would like to donate, please use the appropriate donate button to access PayPal. Thank you!