The Anchorage
Personal website of Gregory K. Maxey, Commander USN (Retired)

The Anchorage
Personal website of Gregory K. Maxey, Commander USN (Retired)
The information, illustrations and code contained in my "Microsoft Word Tips" are provided free and without risk or obligation.


However, the work is mine. If you use it for commercial purposes or benefit from my efforts through income earned or time saved then a donation, however small, will help to ensure the continued availability of this resource.
If you would like to donate, please use the appropriate donate button to access PayPal. Thank you!
This Microsoft Word Tips & Microsoft Word Help page provides examples and discussion on using Word's Line Numbering feature. This page is born of a brief détente between two bitter foes (a separate story) and the fruits of a quest to display line numbers in the right hand margin like in the text sample shown below.
![]() Note: Steps, illustrations and descriptions in this tips page are applicable to a standard U.S. English installation of Word 2007 and Windows XP. Results with Word 2010 or other operating system/installation language may vary.
Note: Steps, illustrations and descriptions in this tips page are applicable to a standard U.S. English installation of Word 2007 and Windows XP. Results with Word 2010 or other operating system/installation language may vary.

With the exception of a few suggestions for mimicking line numbering by anchoring a textbox containing appropriate numbers in the header, a Google search came up empty and returned nothing to suggest how this could be achieved using Word's line numbering feature. The solution requires a bit of Word trickery.
The "key" is enabling a right to left script language such as Hebrew or Arabic.
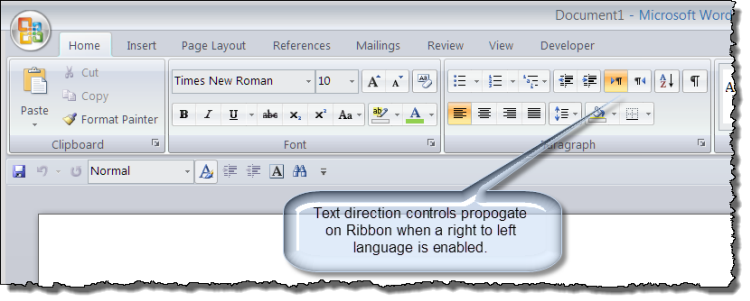
When a right to left script language is enabled the Word user interface (UI) reflects (at least) two changes.

In the example shown above the text is separated by a continuous section break into two sections. I displayed non-printing characters and an empty paragraph to clearly show the section break.
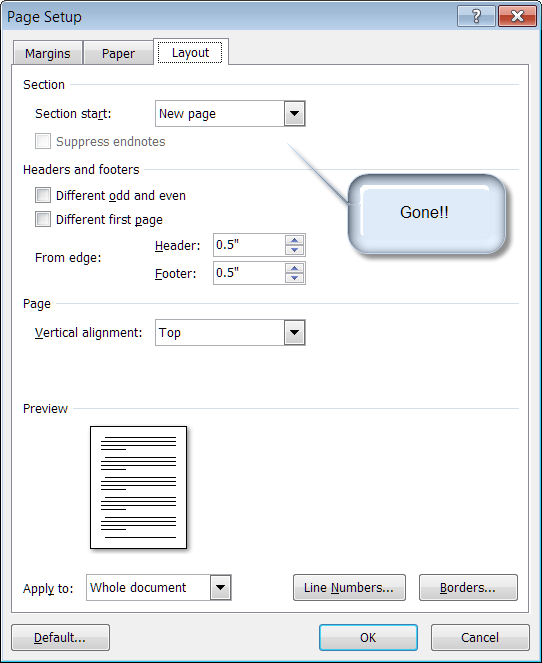
In Section 1, the quotation (or the portion in italics), the lines are numbered. The text is "right aligned, left to right text," with the section direction set to "Right to left." However, it is the section direction setting that determines line number placement. Applying these settings are shown in the following illustrations:


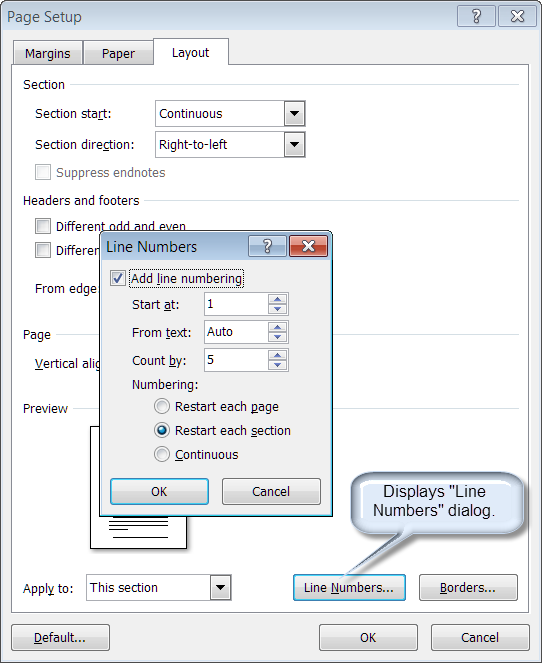
In Section 2 in the example text above, the credit lines (or the portion in roman text), line numbering is not enabled.

The follow illustrates several examples of left to right and right to left script text with line numbering displayed. I included non-printing characters so you will see the section breaks."
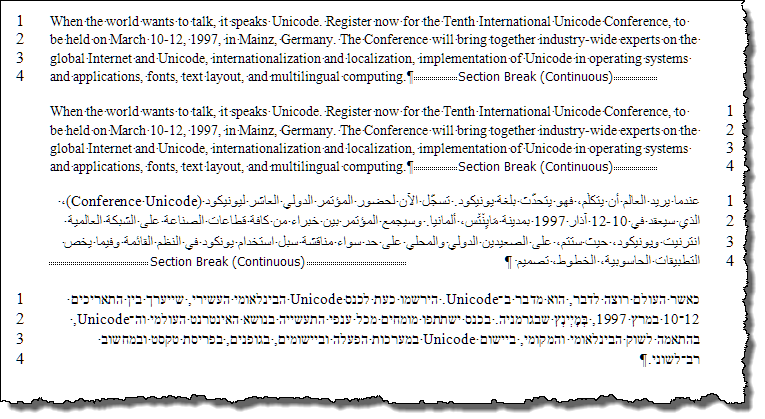
These examples clearly show that it is section alignment that determines in which margin line numbers are displayed. The display is not dependent on or affected by either text alignment or text direction.
Remember though, it is not section alignment alone. For line numbers to appear in the right margin you must set the section alignment to right to left "and" have a right to left script language enabled.
This can be demonstrated using VBA in the following manner.

Sub Demo1()
  With ActiveDocument.Sections(1).PageSetup
    .SectionDirection = wdSectionDirectionLtr
    .LineNumbering.Active = True
  End With
lbl_Exit:
  Exit Sub
End Sub
![]() See: Installing Macros for instructions on how to set up and use the macros provided in this Microsoft Word Help & Microsoft Word Tips page.
See: Installing Macros for instructions on how to set up and use the macros provided in this Microsoft Word Help & Microsoft Word Tips page.

ActiveDocument.Sections(1).PageSetup.SectionDirection = wdSectionDirectionRtr

That's it! I hope you have found this tips page useful and informative.
The information, illustrations and code contained in my "Microsoft Word Tips" are provided free and without risk or obligation.


However, the work is mine. If you use it for commercial purposes or benefit from my efforts through income earned or time saved then a donation, however small, will help to ensure the continued availability of this resource.
If you would like to donate, please use the appropriate donate button to access PayPal. Thank you!