The Anchorage
Personal website of Gregory K. Maxey, Commander USN (Retired)

The Anchorage
Personal website of Gregory K. Maxey, Commander USN (Retired)
The information, illustrations and code contained in my "Microsoft Word Tips" are provided free and without risk or obligation.


However, the work is mine. If you use it for commercial purposes or benefit from my efforts through income earned or time saved then a donation, however small, will help to ensure the continued availability of this resource.
If you would like to donate, please use the appropriate donate button to access PayPal. Thank you!
The purpose of this Microsoft Word Tips & Microsoft Word Help page is to introduce and publish "Photo Gallery Add-In" for Word.
The motivation for creating the add-in came after friend and Word MVP Graham Mayor shared a document template that he had prepared for a client. The template simplified the process of choosing and inserting a group of image files into a document image gallery.
Graham well knows how I like to tinker with code, both mine and his! Seeing a lot of potential for expansion in Graham's template, I offered him some ideas and processes to incorporate into his template. Graham finally came onboard with the idea for an add-in. He and I both have continued to develop and expand those processes in the add-in.
Word provides some powerful tools that you can use to insert and format images into your documents.
Using these tools is time consuming, especially when you need to insert and format multiple images in a gallery layout. First you have to create a gallery container (e.g., a table) and then you have to insert and format the images one at a time.
Photo Gallery Add-In is intended make image gallery presentations in your documents as easy as typing text!
The gallery images are automatically captioned with their filenames (excluding the extension) with the option of adding prefix numbering and text.
Multiple galleries may be included in the same document, and the galleries may be replaced, or added to, by re-running the function from its ribbon command, with the cursor located in the appropriate gallery.
After loading the add-in, either manually or automatically from Word's start-up folder, a new Photo Gallery control group shown below appears on the ribbon insert tab.

Clicking the Gallery Control Panel control launches the add-in user interface. On first use, and subsequently until you disable it using the provided checkbox, a disclaimer page is displayed.
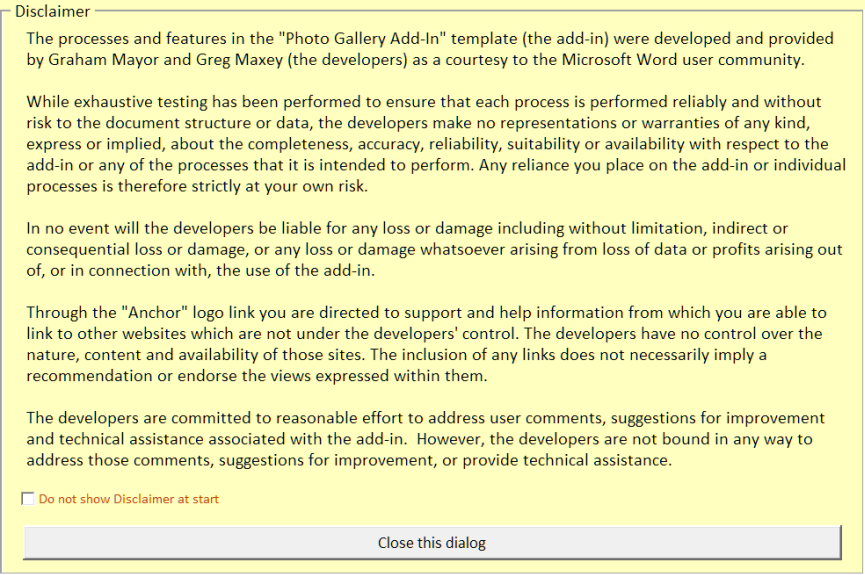
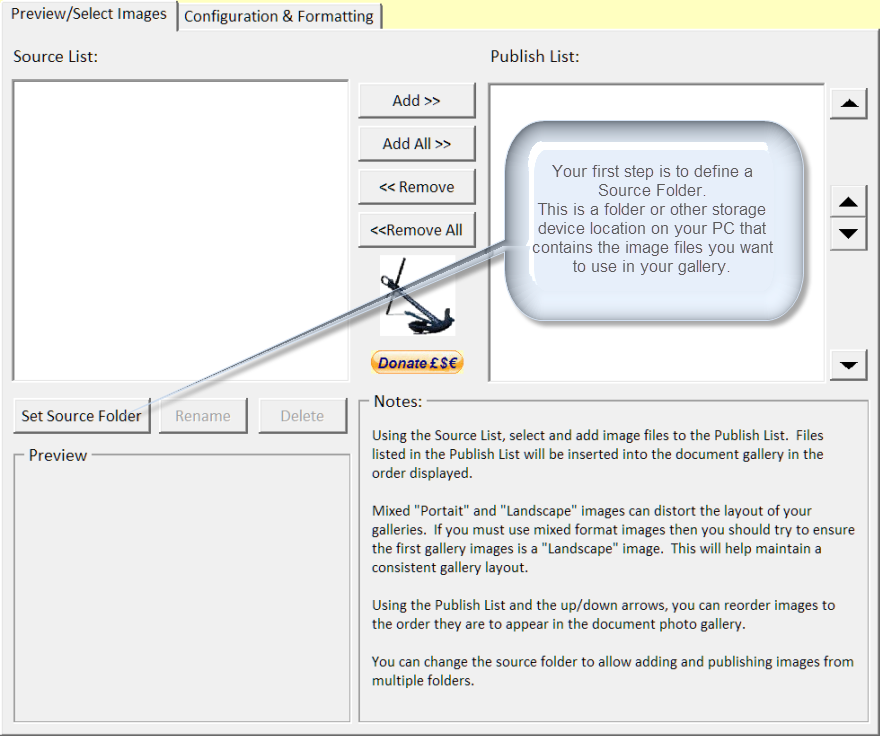
Closing the disclaimer dialog displays the add-in userform interface. The Preview\Select Images page is displayed first. Your first step is to select and define the source folder where your image files are stored.
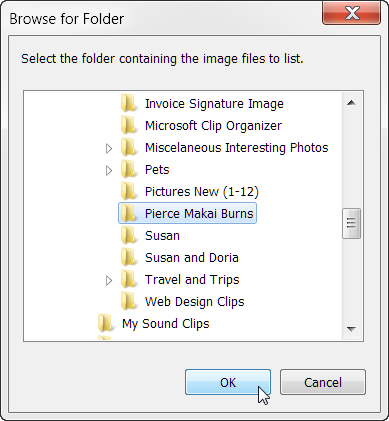
Clicking the Set Source Folder control launches a dialog which you can use to navigate to and select the folder containing your image files. Here I've chosen a folder containing images of my newborn grandson.
After selecting a source folder and clicking OK, you are returned you to the Preview\Select Images page where all valid graphic image files contained in the source folder are listed.
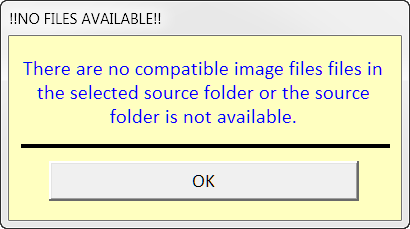
![]() Note: If you select a folder (e.g., a removable disk drive) that is not available or doesn't contain any images files, the following dialog is displayed. This same dialog appears if you subsequently remove the device or all images from the device set as your source folder.
Note: If you select a folder (e.g., a removable disk drive) that is not available or doesn't contain any images files, the following dialog is displayed. This same dialog appears if you subsequently remove the device or all images from the device set as your source folder.
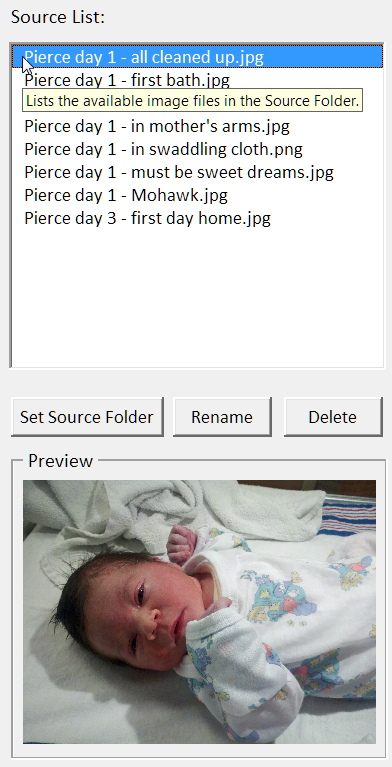
You can click and preview images listed in the source folder by selecting the image with your mouse. The Rename and Delete buttons can be used to rename or delete individually selected files.
![]() Caution: The "Rename" and "Delete" buttons rename and delete files both in the Source List and the source folder containing the images files. They do what they say they do!!
Caution: The "Rename" and "Delete" buttons rename and delete files both in the Source List and the source folder containing the images files. They do what they say they do!!
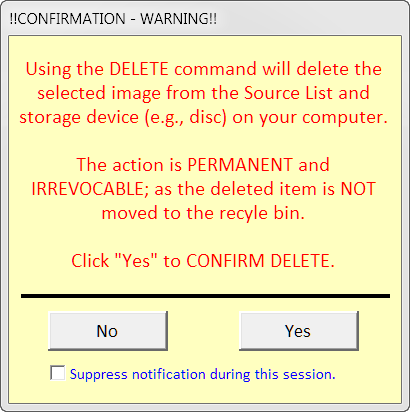
Considering the permanent and irrevocable process using the Delete command, We've added a confirmation dialog shown below. You can suppress the dialog during your current session using the add-in, but it is reset to display automatically when you start a new session
The Source List (and Publish List) are extended multi-select listboxes. You can select single items using the mouse, contiguous items using Shift+mouse, or non-contiguous items using Ctrl+mouse.
![]() Note: The last image selected in either list is the image displayed in the preview.
Note: The last image selected in either list is the image displayed in the preview.
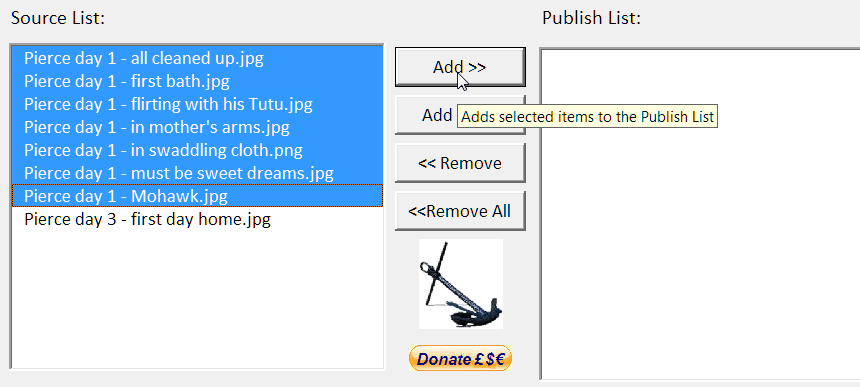
Images selected in the Source List are added to the Publish List using the Add>> button. Or you can use Add All>> to add all files listed in the Source List to the Publish List.
If you select and single item and click Add>> the item is added to the Publish List and the next item in the Source List is automatically selected and previewed. By simply continuing to click the Add>> button you can add files to the Publish List in the listed sequence.
The Publish List contains a list of all image files that you want to publish to a document image gallery. Items are published in the document gallery in the order listed in the Publish List.
![]() Note: Only single items or items selected in a contiguous list can be moved in the list.
Note: Only single items or items selected in a contiguous list can be moved in the list.
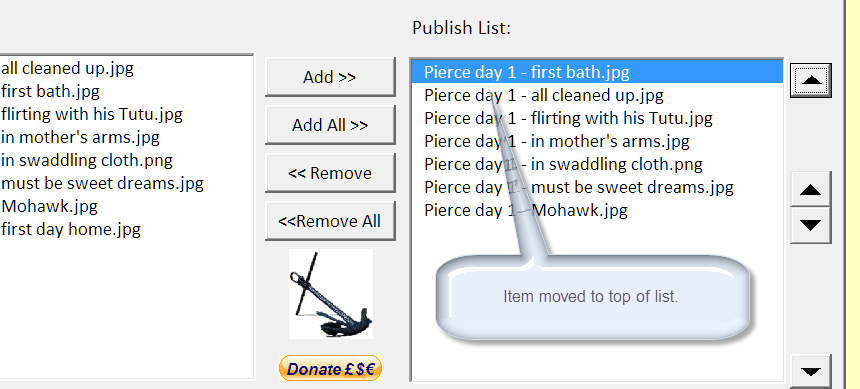
Should you need to publish images located in multiple different folders, you can simply define a new source folder using the Source List Set Source Folder. This will clear the existing items in the Source List and load the new items.
Once you have defined and arranged the images you want to publish, you can define the configuration settings for the gallery. Clicking the Configuration & Formatting tab opens the dialog shown below. This dialog displays the default configuration and format settings for the document photo gallery. Using the dialog, you can:
![]() Note: The add-in will create a document table (gallery) using its configured settings. When using it for the first time, take a moment to review the default settings on the configuration page and make any changes to taste. If you don't like the results, put the cursor in the table and re-run the macro, choosing the option to replace the table. You can then make changes as required.
Changes you make to the configuration will become the default settings, until changed again.
Note: The add-in will create a document table (gallery) using its configured settings. When using it for the first time, take a moment to review the default settings on the configuration page and make any changes to taste. If you don't like the results, put the cursor in the table and re-run the macro, choosing the option to replace the table. You can then make changes as required.
Changes you make to the configuration will become the default settings, until changed again.
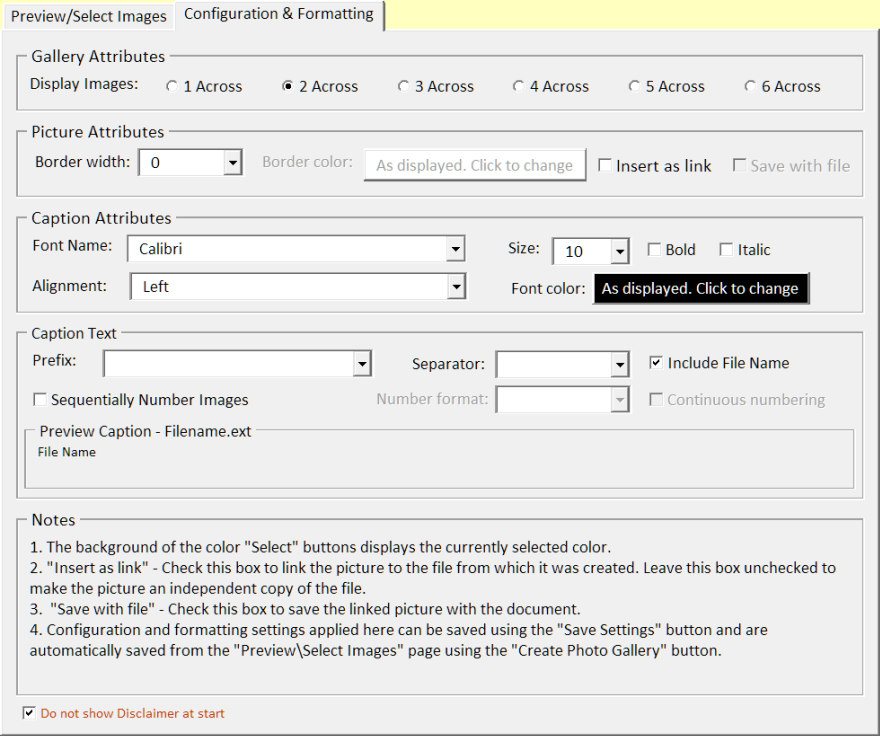
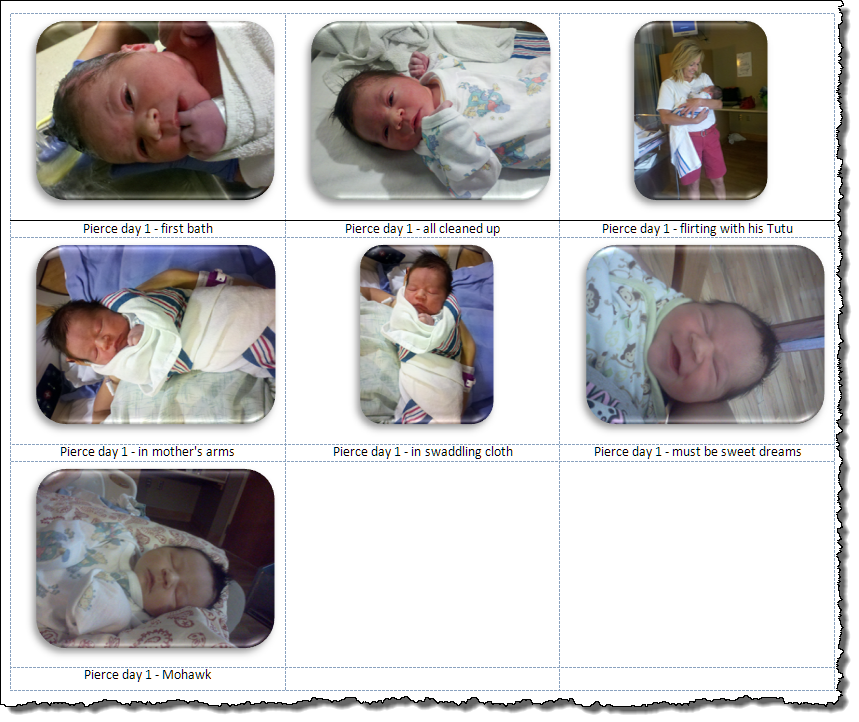
For the demonstration gallery shown below, I used the following configuration settings:
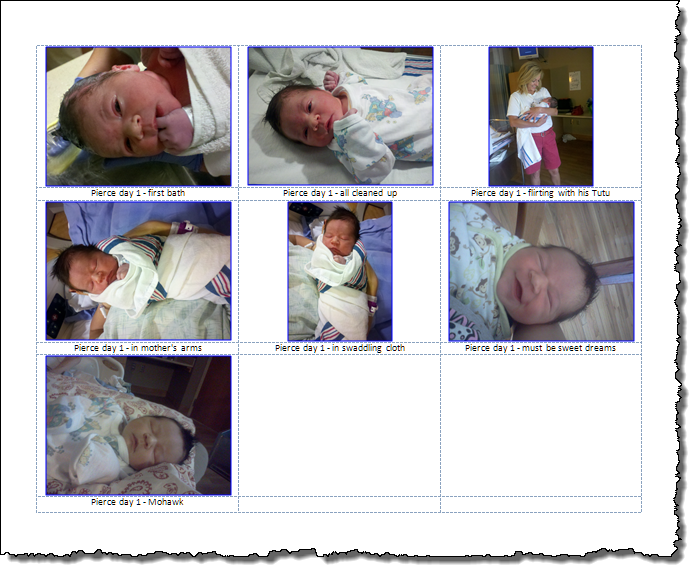
The images are automatically sized to fit the Word table (gallery) created by the add-in. Factors that determine the exact size of the gallery images are too numerous to try to handle in a general add-in.
Here are a few tips that you can employ when creating galleries:
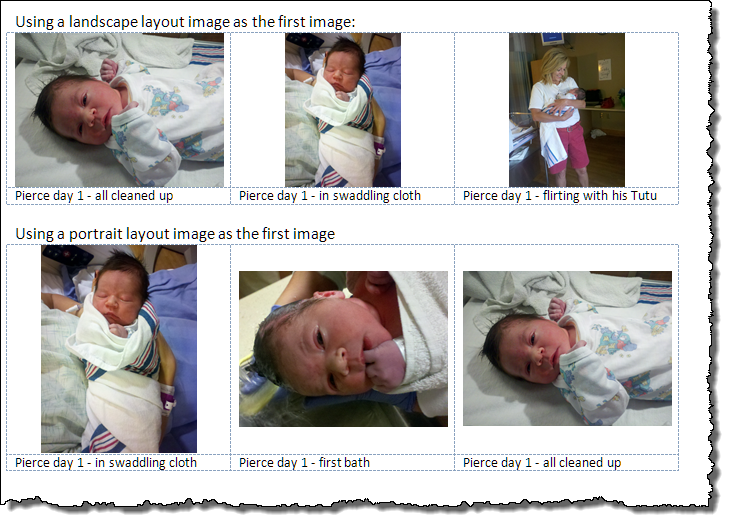
![]() Note: Modern digital cameras can produce huge images both in dimensions and file size. Such large sizes are neither necessary nor desirable when reproducing in a Word document. The process can therefore be accelerated, and the document made more stable, by setting your camera to take smaller images or shrinking your existing images. There are plenty of software products, some of them free (such as Google's Picasa graphics manager) which will shrink the images to more manageable proportions in a batch process.
Note: Modern digital cameras can produce huge images both in dimensions and file size. Such large sizes are neither necessary nor desirable when reproducing in a Word document. The process can therefore be accelerated, and the document made more stable, by setting your camera to take smaller images or shrinking your existing images. There are plenty of software products, some of them free (such as Google's Picasa graphics manager) which will shrink the images to more manageable proportions in a batch process.
The add-in can be used repeatedly in your document to create additional galleries or append/replace existing galleries.
Auxiliary features of the add-in are the Format Painter and Save as PDF controls shown below.
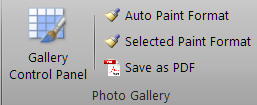
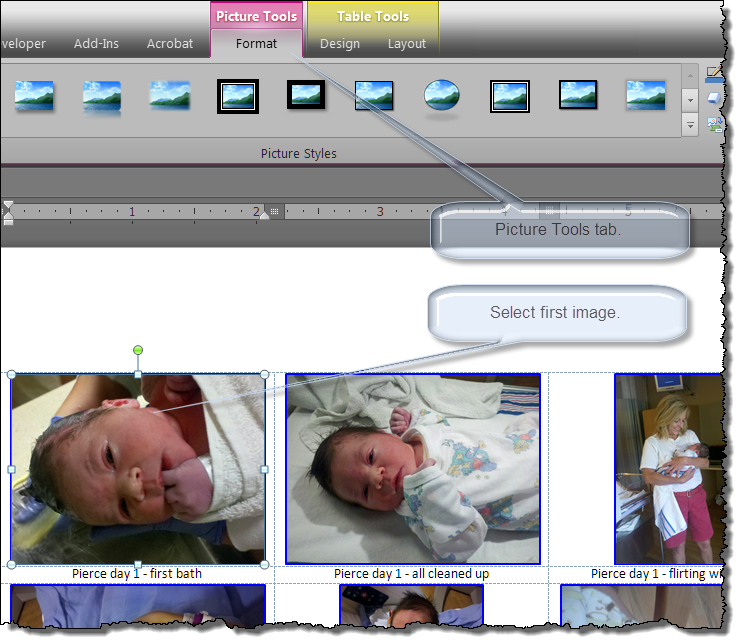
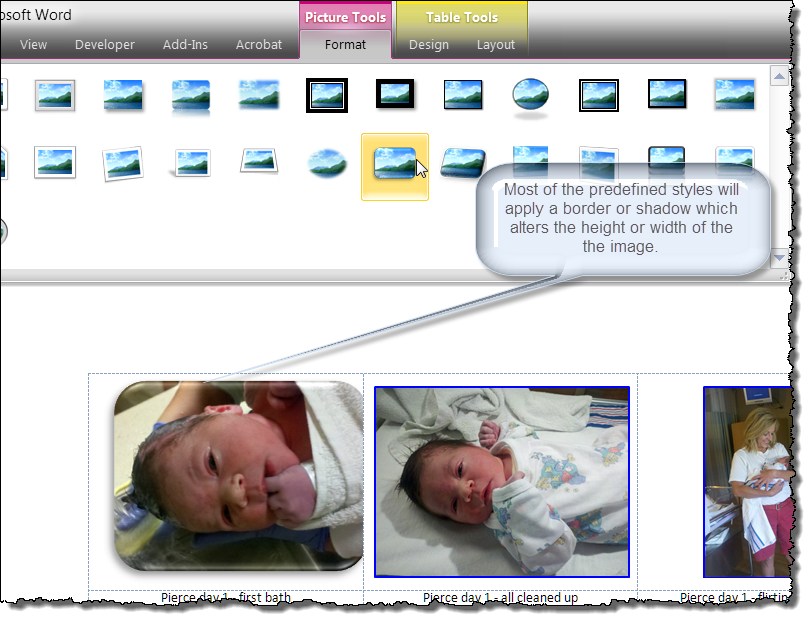
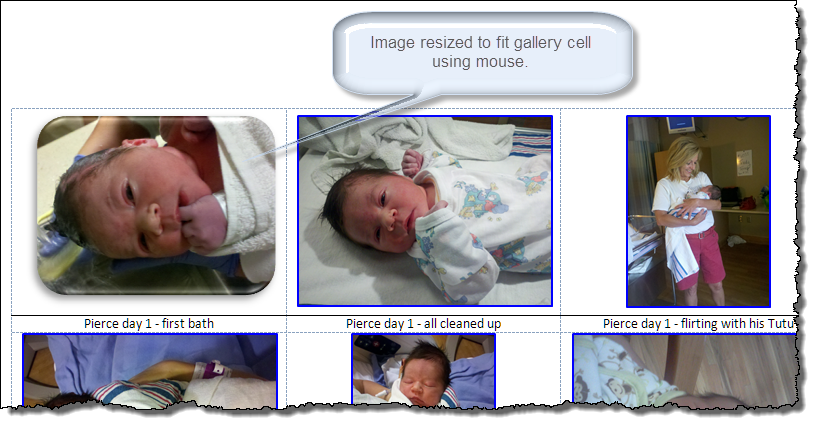
Auto Paint Format is a handy tool for applying advanced picture formatting to the gallery images. The following steps describe the process:
![]() Note: You can also apply manually formatting to the first image using Word's built-in picture formatting tools and copy your formatting to the remaining images with the Format Painter.
Note: You can also apply manually formatting to the first image using Word's built-in picture formatting tools and copy your formatting to the remaining images with the Format Painter.
Picture attributes, particularly borders, shadow and reflection, can significantly alter the size of the gallery image. In mixed format galleries (i.e., galleries containing both portrait and landscape layout images), this can make it impossible to ensure a consistent gallery layout with the Auto Paint Format feature. The Select Paint Format control allows you to select either a portrait or landscape image, size it appropriately, and apply the selected image format to all images with a similar layout.
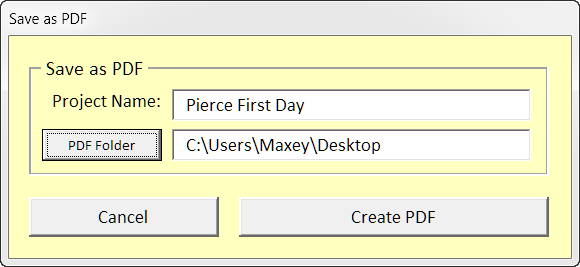
The Save as PDF control launches the following dialog you can use to save your documents with galleries as a PDF project.
Download the add-in here: Photo Gallery Add-In Word 2007-2016
![]() For more on template add-ins and how to load them, see: Organizing Your Macros/Template Add-ins at: Installing Macros
For more on template add-ins and how to load them, see: Organizing Your Macros/Template Add-ins at: Installing Macros
The development and testing of this template involved considerable time and intellectual effort. Accordingly, I have not made the code modules containing the processes available for public viewing. I was happy to do the work because I enjoy the challenge and I am pleased to share the add-in with the Word user community. However, I will not respond to requests to further refine or customize this project without demonstrated willingness from the requester to compensate me for the work. Support donations are always appreciated!!
Should you desire further customization to meet a specific requirement then contact me or Graham Mayor. We are usually available to perform this type of work.
The information, illustrations and code contained in my "Microsoft Word Tips" are provided free and without risk or obligation.


However, the work is mine. If you use it for commercial purposes or benefit from my efforts through income earned or time saved then a donation, however small, will help to ensure the continued availability of this resource.
If you would like to donate, please use the appropriate donate button to access PayPal. Thank you!